
Let's explore how to get nice bright, sharp photos of RC cars on a plain white background. Action shots are a whole different art that won't be discussed here.
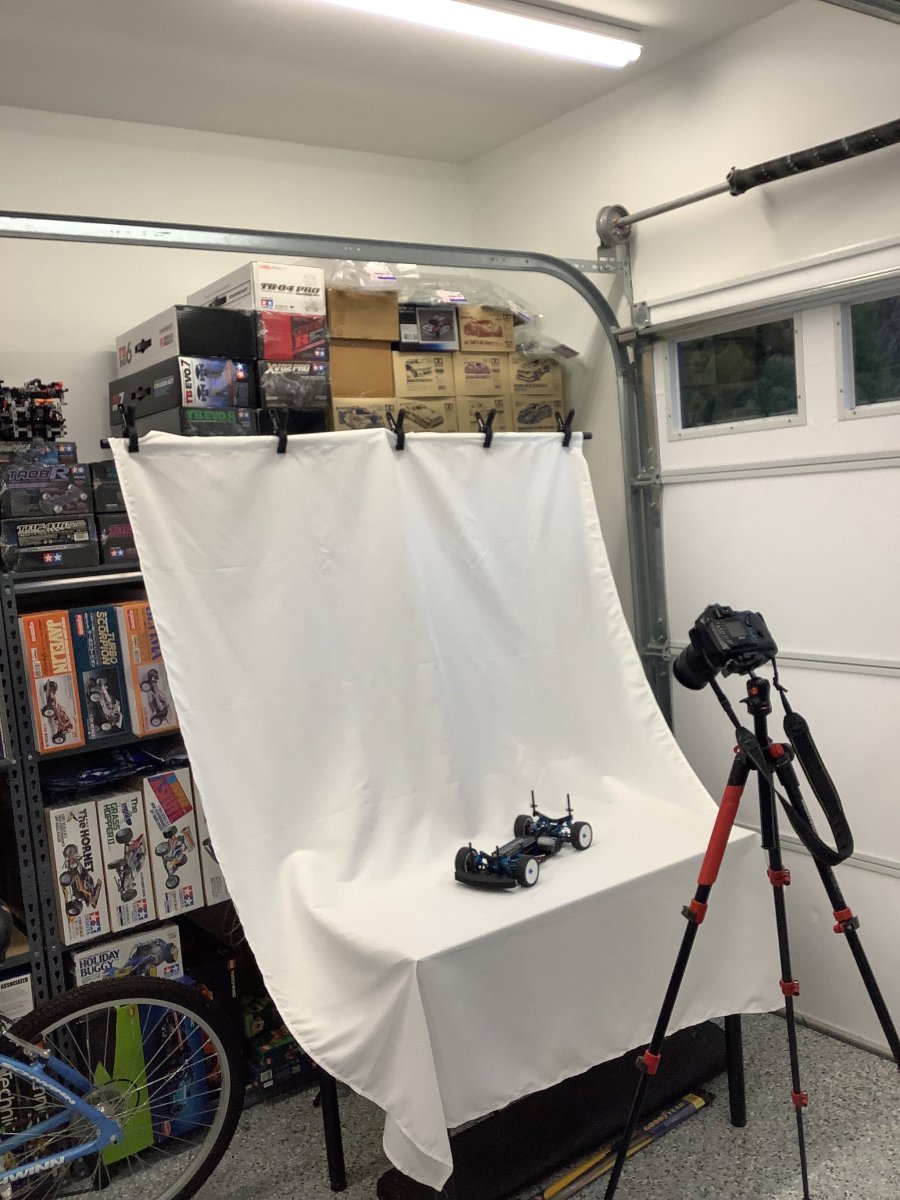
Of course you can use a professional backdrop with fancy 3-point lighting and get great results, but I'm going to show how to get similar results with a much simpler setup. The picture below shows the equipment I'm currently using. This is a little IKEA table sitting in my garage under standard overhead LED lighting. I've got a white sheet hanging from a simple stand and draped over the table. It's important to try to get a nice curve in the sheet where it transitions from vertical to horizontal so there won't be many creases or shadows.
The camera is a 20+ year old Nikon DSLR. You could theoretically do this with a camera phone, but you would need the ability to control exposure time and attach to a tripod. We'll explore why next.
The camera settings are absolutely critical. The lens is going to be quite close to the subject which usually causes a problem with depth of field. This means that only certain portions of the subject will be in focus while other portions which are nearer to or further from the lens will be blurry.
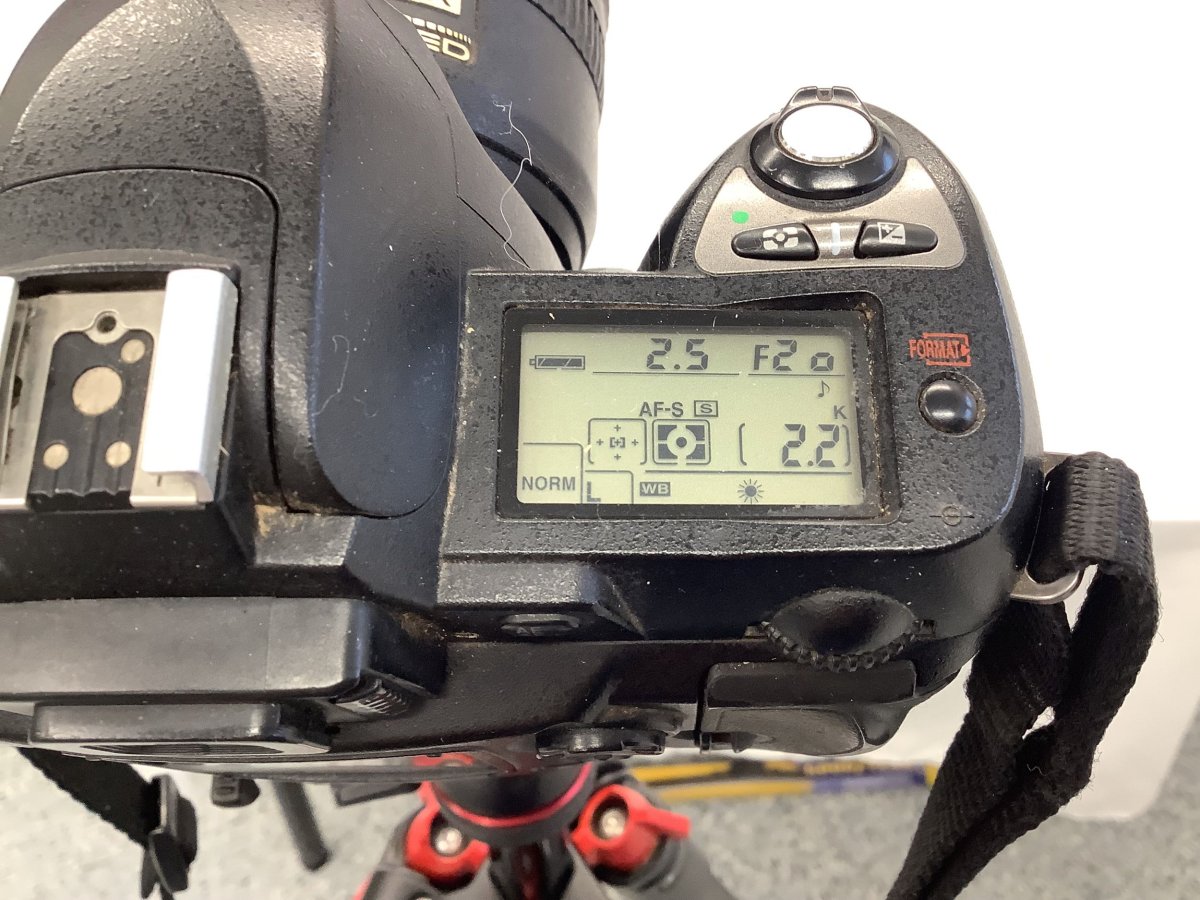
We want the whole car to be in focus so that means we need to set the aperture as small as possible. The good news is that a large aperture is what makes many lenses expensive while pretty much any lens is going to be able to go small. I have my aperture set to F20 (see camera settings below) which is practically a pinhole. The problem with a tiny aperture is that hardly any light gets in. That means we'll need a very long exposure to collect enough light.
I have my shutter speed set to 1/2.5 second. This is slow enough that there's no way you can hold the camera still enough for that long to get a sharp picture by hand. That's why we need the tripod. In fact, even pushing the button to take the picture can introduce some vibration. I recommend using a timer or a remote to trigger the shutter for best results. I also set my white balance to "sunshine" because I'm using full spectrum lights, but we're going to be correcting the color in software later anyway so this isn't so important. If you have a zoom lens, put the camera as far away as you can get it while still being able to zoom in enough to have the car fill the frame.
Now I'll be doing some simple editing in Photoshop, but you can get the same results with free photo editing software like GIMP.
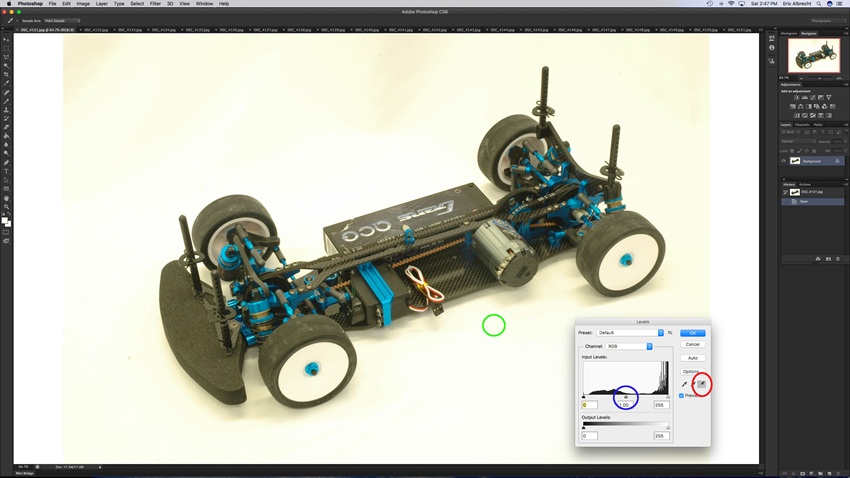
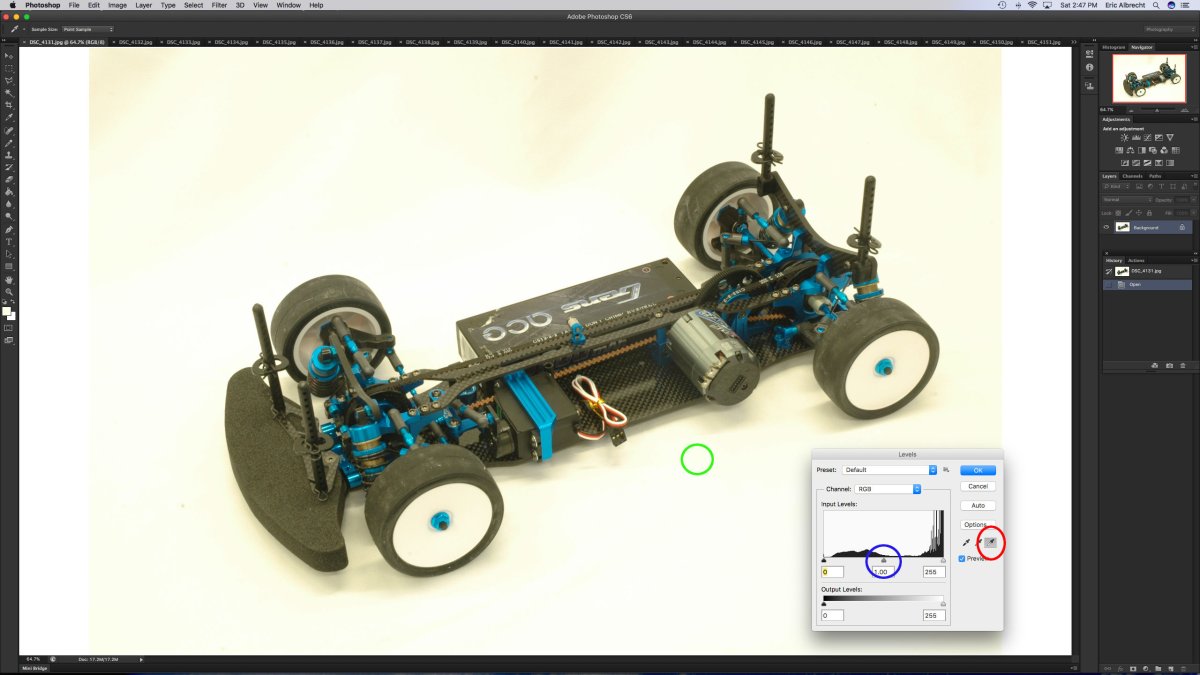
The picture below shows how the image comes off the camera. It's not that great. It is in focus, but it is pretty dim and yellowish and there are blotches and shadows in the background. We can fix almost all of that by adjusting the levels. We're going to bring up the Levels dialog and redefine the white point. Do this by first selecting the white eye dropper (circled in red) and then select a point anywhere in the image that you want to define as white. I usually pick a point in the background that is very slightly in shadow (circled in green). The brightness and color of the whole image will then be adjusted automatically to make that point white. Play around with different points to see what works. If the image is still a little to dark or bright in the shadows, you can adjust the midpoint by moving the midpoint slighter (circled in blue).
Hey that worked pretty well!
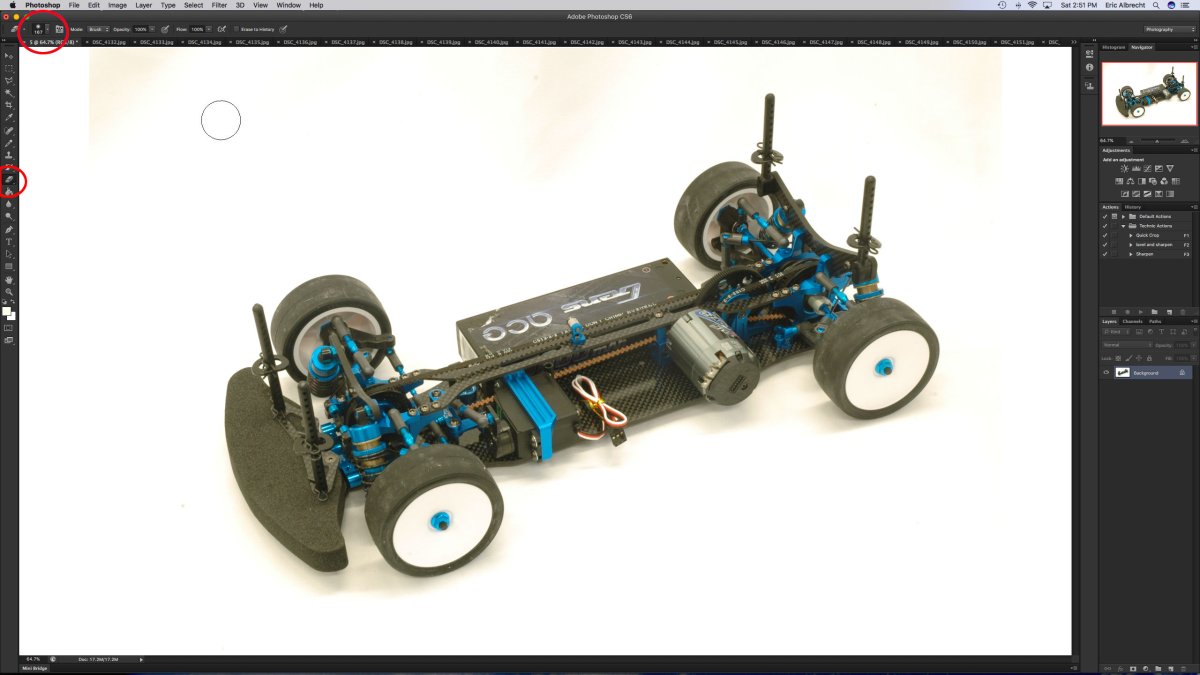
The picture looks almost like we want it now. The background still has some shadows and texture though. The good news is that since we just want the background to be white anyway, we can use the eraser to tool to just remove any offending blotches. I'm using a big 167 pixel brush as shown. I use a brush with soft edges (anti-aliased) just to make sure there won't be any harsh transitions. Just wave the brush around over any shadowed edges in the background or corners and they will disappear. This can also be used to remove any bits of dirt or stains that might be on the backdrop. If there are small areas of the image that have unwanted shadows, you might need to go in with a smaller brush. In this case I just cleared out the corners of the image.
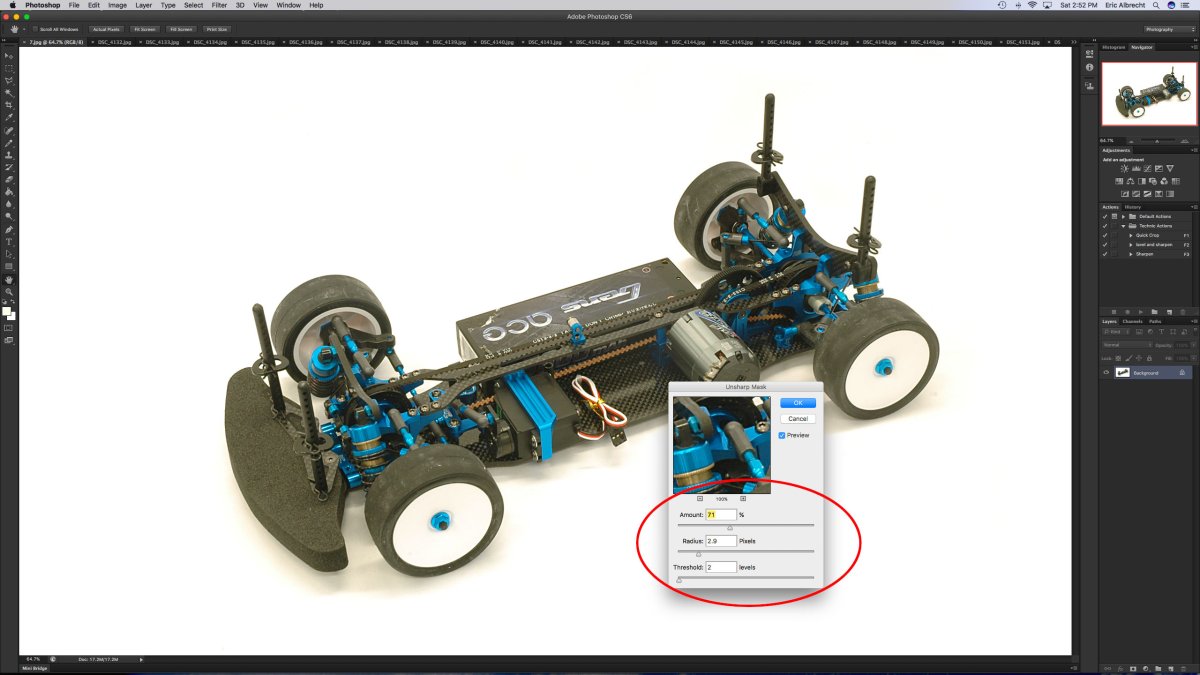
We're almost done. Now we're going to sharpen the image. Choose the Unsharp Mask filter and move the settings to your liking. The settings shown are what I use, but I'm using an old 2 megapixel camera. If your image is significantly larger you may want to make changes.
The only thing left to do is crop the image to make sure the car fills the frame, but if you framed your image properly to begin with then were won't be much to do here. Once you are done you can just save your image with the default settings or you can take a couple of steps to reduce the file size.
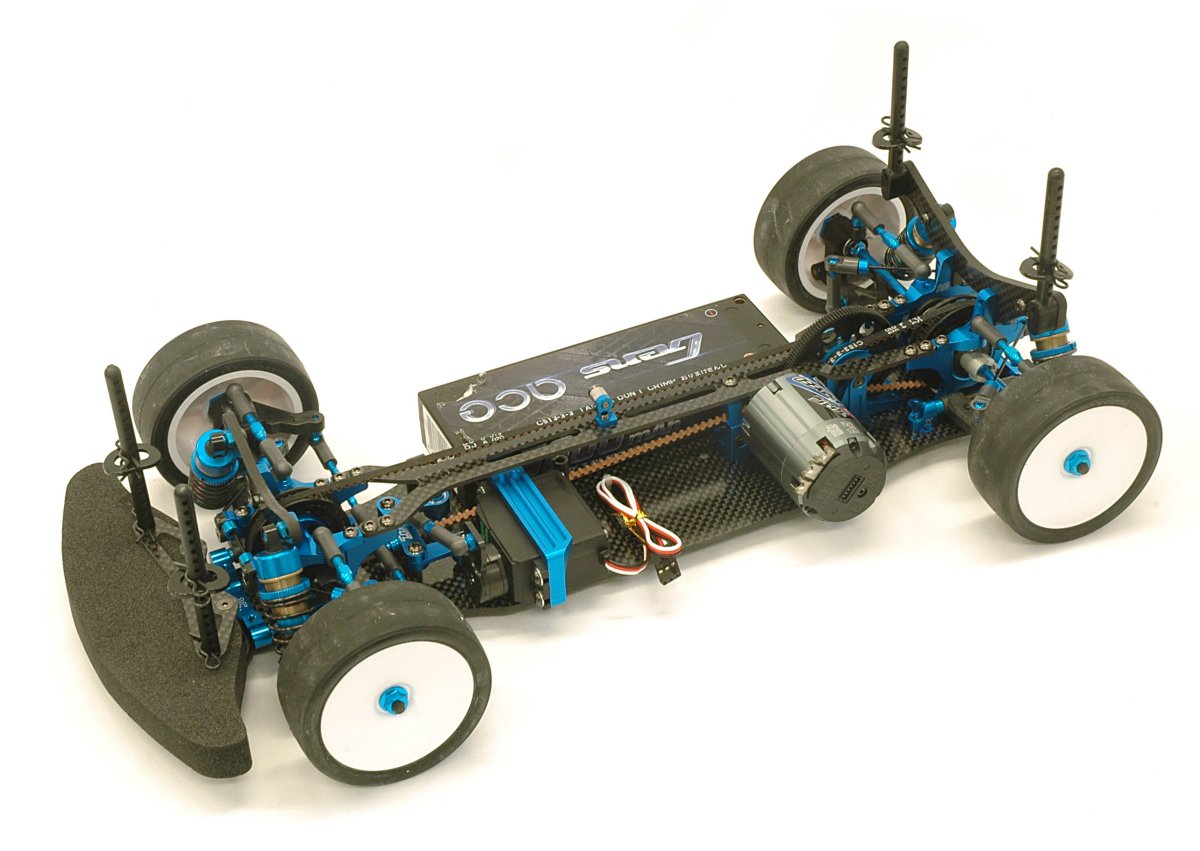
I set the JPG compression level to about 80% which is good enough without being too large, and I always deselect the EXIF data. This is all the information about where and when the photo was taken and what the camera settings were. No one on the web can see any of that anyway so there is no reason to take up space storing it. That's it! The final photo is below. This picture is about 2500 pixels wide and is only 414kb. If you zoom in you can see the limitations of this method. A professional lighting setup and a macro lens would give better results, but this is good enough for most of us.
____________________________
Written by Eric Albrecht
Visit Eric's personal site with lots of build threads.