|
|
|
|
Ha, I had one & I've only just got rid of it... Er, I can tell you "Blackspur" (& others) do a copy of it (I'm assuming you mean the blue one with the brass adjustable nozzle, ie no adjustable needle? Works off disposable air cans). Airbrushing is all about practice, & to be honest, whilst the "Dual action" types are so cheap, you'd be better to get one of those if you can. Sensibly, also invest in a small compressor for it (Or even a spare tyre can be used) as it quickly gets expensive using the cans. Dual action guns let you vary airflow independently of paint flow, allowing "fade out" & variable width lines while you're spraying. If using a compressor, get an air filter/regulator too - this makes it easier to set a sensible air flow/pressure & will remove any moisture/dirt in the air. Air pressure depends mostly on gun type, but also on paint thickness/type, & how thick per layer you're trying to put the paint on (I usually use around 20psi air, thin the paint 1:3 to 1:5 ish (Wants to look like water/ink), spray at 150-200mm from the workpiece, expect to put around 4 coats minimum on). It's best to put lots of really thin coats on, allowing to just touch dry between each (10-15 minutes?). It's easier to get a shiny finish if you use high gloss thinners, as it dries slower & gives the paint a chance to flow/settle smooth. Don't use too much air to overcome too thick a paint mix, you'll end up blowing the paint around on the workpiece. When spraying, get the air flow going first, then adjust your paint flow to what you want, before moving onto the work. Keep a steady distance & speed across & beyond the work before turning the paint off. Don't try to paint in conditions where it's too cold/hot or windy & ensure good ventilation. Good idea to where a mask too - you'll be surprised how far the paint mist will travel & settle as a sticky dust. Always throughly clean the gun when you're done (Usually means taking it to bits to clean properly). You SHOULD find it is MUCH easier & more reliable than using aerosol paint, but practice practice practice!
Custom F2
...
Hilux crossmember drawing
...
F2 axle drawing
...
Quattro radio lid
...
Holiday Buggy motor bracket drawing
...
Quattro resto
...
HitnMiss engine
...
Wild Willy resto
...
Mardave Cobra resto
...
Thunder Dragon resto
...
Grasshopper resto
...
XR311 resto
...
Modded XR311
...
Carbon 25th scratch build
|
|
|
Please Log in to join the conversation. |
|
A couple of useful additions - I use a full size "Touch-up" gun (Full size as in for spraying real cars, the gun itself is 300mL size & has a relatively fine nozzle) for doing the base coats on toy cars & only use the airbrush for the larger detailing or complete small parts. (2) y'know the scenario; it's late a t night, everything's shut & you 'have to just finish this bit before I can go to bed' & then you discover that you don't have the right type of paint, ie matt instead of gloss etc? There's a way around it - use matt paint & laquer over it for a gloss finish. OR use a gloss paint but thin using 'standard' thinners, usually resulting in a matt-ish finish (More satin than matt, but the more thinner you use & the more you let it dry between coats, the more matt it'll come out)
Custom F2
...
Hilux crossmember drawing
...
F2 axle drawing
...
Quattro radio lid
...
Holiday Buggy motor bracket drawing
...
Quattro resto
...
HitnMiss engine
...
Wild Willy resto
...
Mardave Cobra resto
...
Thunder Dragon resto
...
Grasshopper resto
...
XR311 resto
...
Modded XR311
...
Carbon 25th scratch build
|
|
|
Please Log in to join the conversation. |
|
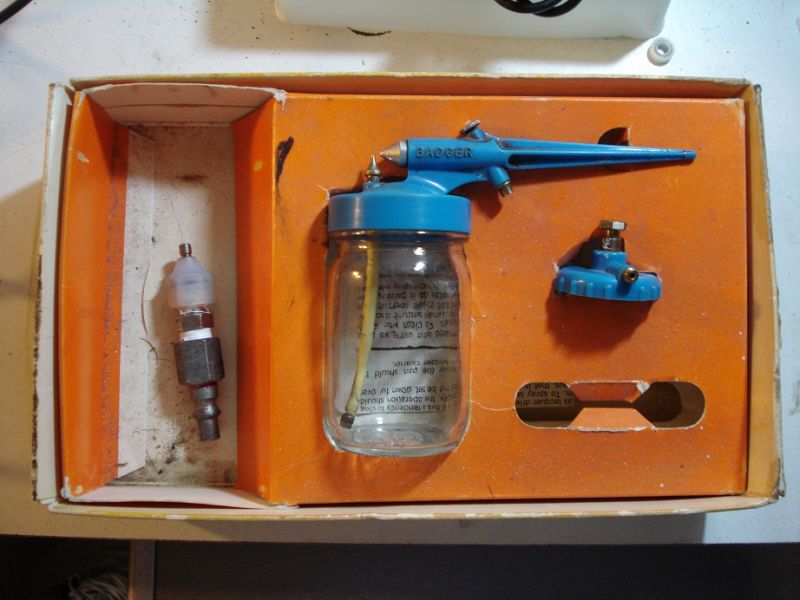
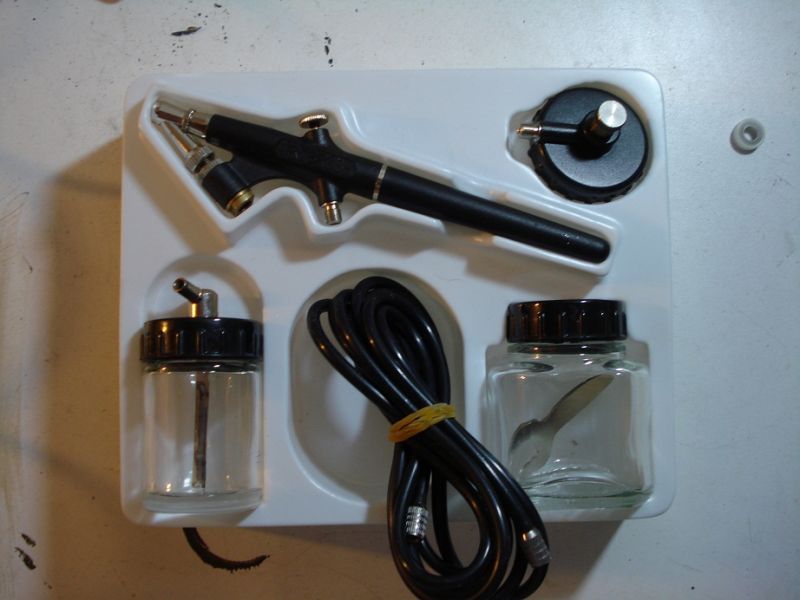
I though because this thread has grown a bit, I might as well post pics of my other sprayguns.
My Dad's Badger from 1982, a year after I was born. It has sprayed many of his RC war planes, and now many of my RC cars. And this is just a cheap spraygun I use for spraying primer mostly. I just can't get this one to work properly, so therefore I use it for primer work. My Projects:
Bullhead Rebuild ... Ford F350 Mods ... Manta Ray Revival ... Custom Super Hornet Build ... TL-01 Crawler ... CC-01 Pick-up ... CR-01 With Hop ups ... Project Unknown ... Clod crew cab ... Other: Custom Display cases ... Limited Slip Diff(LSD) ... |
|
|
Please Log in to join the conversation. |
|
Got to admit I have looked at airbrushes/sprayguns ... but I think I have enough trouble spraying here as it is - temperature, humidity, wind, rain, dust, having to do it outdoors ... I think mixing paints, controlling paint & air flow, and cleaning up afterwards are a bridge too far ATM
|
|
Please Log in to join the conversation. |
This would be the biggest obstacle for me. I really hate having to clean with paint thinner. Not very healthy either... So I'll stick to waterbased paints like Tamiya and Faskolor. They can be thinned with water and cleaned with (isoprophyl alcohol) window cleaner. It's not a 'real' airbrush but I'm very happy with this Tamiya Spray-Work : Although I still have to spray the first bit of paint with it... |
|
|
Please Log in to join the conversation. |
|
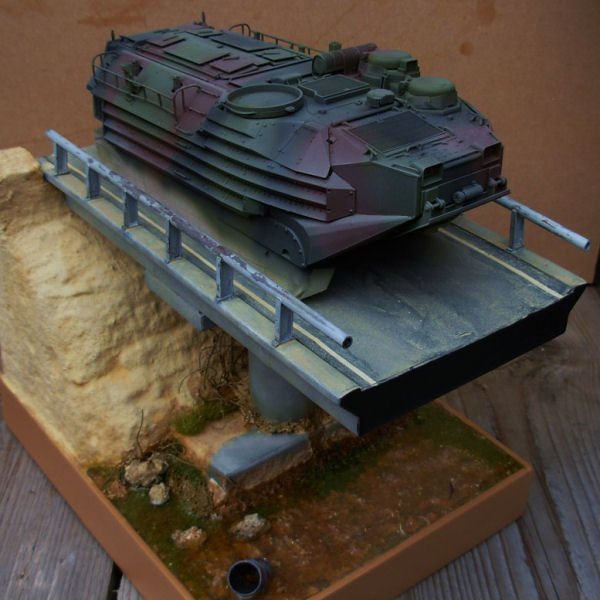
I'd be very happy if I could ever reach this level :
And check out these paintjobs... all airbrush, not a single decal : Crissypaint |
|
|
Please Log in to join the conversation.
Last edit: by Edou.
|
|
I've used the Tamiya paint can before. I find with spray cans, the best thing to do with them is soak the can in warm water before you spray with them.
But spraying with the spray gun for me is still the best and cheapest way to spray. My Projects:
Bullhead Rebuild ... Ford F350 Mods ... Manta Ray Revival ... Custom Super Hornet Build ... TL-01 Crawler ... CC-01 Pick-up ... CR-01 With Hop ups ... Project Unknown ... Clod crew cab ... Other: Custom Display cases ... Limited Slip Diff(LSD) ... |
|
|
Please Log in to join the conversation. |
|
Louisbaby - yep, the blue one is what I had pictured in my mind - simple but effective, but expensive to run unless you have a compressor adaptor (Which it looks like you have). The one I just got rid of was the same as your black one & yes they're a pain out of the box BUT with a bit of tweaking, they can be quite good - I found that the nozzle isn't quite in the right part of the airsteam, but if you loosen off the brass locknut & let the nozzle assembly drop a bit, you should find it'll become usable. Oh, & check the nozzle O-ring is sealing properly (The threads in the front cone will tear it up & you'll have pressure leakage related lack of paint flow). Nozzle's quite large & adjustment is course, but it'll spray fairly thick mixes & I found mine best for doing large areas. Never managed to get any fine work out of it though.
Jonny - If you point your airbrush in a threatening manner, you should be able to persuade the missus out of the kitchen so you can spray in there (Like I do, much warmer!). Caution is advised though, if she doesn't immediately flinch, give up or anticipate a kicking.... As far as complexity goes, it's like welding, lots to think about if you've never done it before, but as soon as you try it, it all becomes common sense & the more practice you get, the easier it is. Edou - when you see work like that tank, it's more about your artistic skills than being able to operate an airbrush. Being great at operating an airbrush doesn't mean you'll be great at doing a mural on your mate's car. If you appreciate great airbrush artwork, go look at some custom car/truck shows, some of their work is breathtaking! As far as use of thinners goes, use whatever the paint base is eg water for acrylics, iso alcohol for enamels, xylene for cellulose etc. Enamel & acrylic is best for models cos it doesn't bite into the plastic, making it easier to remove when you fancy a change of flavour. I tend to use cellulose paints cos it's what I'm used to & there are far more "tricks" available with the numerous different products out there (Cos painting cars etc is more popular than painting toys). Incidentally, if you also like to use solvent based paints, just keep an eye on the seals in your airbrush as a lot of the solvents will make them temporarily swell & possibly leak, leading to some spurious paint flow problems after extended spraying times. They soon shrink back after you're done though, but just something to bear in mind if you start experiencing difficulty
Custom F2
...
Hilux crossmember drawing
...
F2 axle drawing
...
Quattro radio lid
...
Holiday Buggy motor bracket drawing
...
Quattro resto
...
HitnMiss engine
...
Wild Willy resto
...
Mardave Cobra resto
...
Thunder Dragon resto
...
Grasshopper resto
...
XR311 resto
...
Modded XR311
...
Carbon 25th scratch build
The following user(s) Liked this: Jonny Retro
|
|
|
Please Log in to join the conversation. |
|
|
|