|
|
|
|
The TRF 414X is a holy grail amongst Tamiya collectors and it's precise history is difficult to trace because there are few references and very little of the development was publicly shared. From the data I've been able to gather, Tamiya America was interested in a high-end touring car chassis that could be competitive in international racing, and Tamiya Japan's Masayuki Miura volunteered to head a team (along with Takanori Aoki and Takahiko Yasuito) to develop such a chassis in 1998. The result was a prototype called the TRF 404X. This was never a commercial product and never available to purchase. The chassis was raced and modified until it was mature enough to be turned into a product, the 93013 TRF 414X in 1999. It did not even include a proper manual, but instead used a stack of loose papers showing exploded views of the major components. This was only available in the USA to racers, and appears to have been limited to 150 copies. Those copies were raced, modified, damaged, and/or destroyed by their owners, so finding one today in any condition is a near impossibility. As if that story wasn't convoluted enough, Tamiya Japan released it's own version of the TRF 414X as a "completed model" fully built in a hard case and signed by the developers in 2000. This version does not appear to have any kind of kit number and I wouldn't have had any way of knowing that it even existed except that I found one. The version I was finally able to acquire was never raced and came pristine in a box signed by the developers. Score.
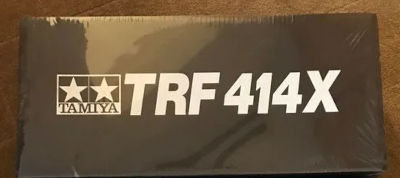
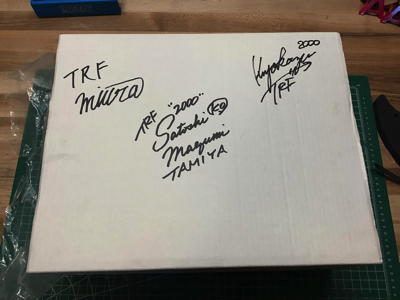
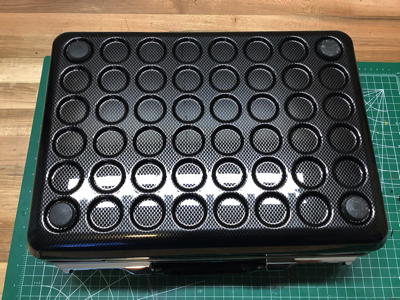
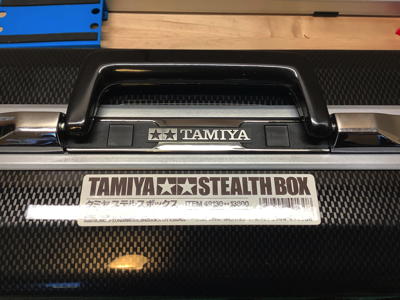
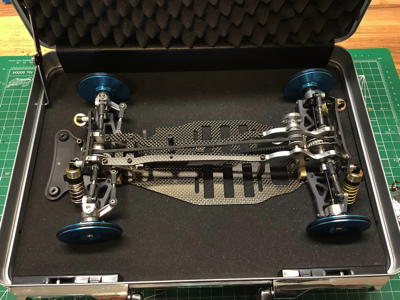
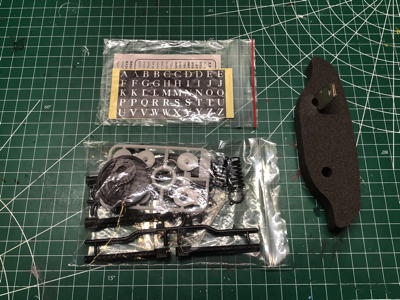
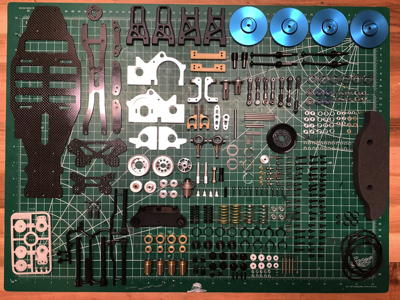
The TRF 414X is a twin belt, 4WD, racing touring car chassis. The upper and lower chassis plates, shock towers, and outer suspension mounts are carbon fiber plate. The bulkheads, pulleys, uprights, hub carriers, knuckles, steering cranks, and shock bodies are all machined aluminum. There are virtually no molded plastic parts in the whole chassis. The few plastic parts in the suspension (the inner suspension mounts and suspension arms) are machined from plastic blocks. Only the bumper support and body posts are molded. The rear axle uses a ball differential and the front uses a one-way setup. There is an additional front one-way bearing in the center shaft. The motor is located just ahead of the rear axle making for a very short rear belt and a much longer front belt. There are no belt tension adjustments in the bulkheads and no intermediate tensioner. The axles have CVD universals. The camber is adjustable at all four corners via turnbuckles and the front toe is adjustable the same way. Rear toe and skid angle are fixed. There are two roll center options available by using different holes in the suspension mounts. There are many optional holes for attachment of the upper control arms and shocks. The pinion and spur gear are 64p, unusual for a Tamiya model. The chassis is configured to use racing saddle packs of sub-C cells strapped down with glass tape. In general I pride myself on having no shelf queens in my collection and driving everything I build, but in this case there is no way this chassis is ever going to see asphalt. It needs to stay exactly as it is and eventually get passed down to future generations. The "standard" TRF 414X (if any version of the model can be called standard) apparently came in the black box shown on the left. (This is not my photo; I found it on the Internet). This is the version that would have been limited to 150 copies and sold only to racing drivers in the US. The version I got came already assembled from Japan in the hard case and box shown on the right. My copy is signed by Tamiya TRF Team members Masayuki Miura, Satoshi Maezumi, and Kiyokazu Suzuki. This version does not have a kit number (that I could find), but based on the "2000" date on the box, this came out after the limited production run of the 93013 kit in 1999. Since there is no kit number and no information on production numbers I can't estimate how many of these were made, but it is a safe bet that this version is even more rare than the "standard" TRF 414X. Maybe this is the only one? My copy of the TRF 414X chassis came in this rare 49130 Tamiya Stealth Box. This is a lockable hard case with foam liner. It has the appearance of carbon fiber, but I would guess this is just a sticker layer because otherwise the box alone would have cost a fortune. There is plenty of room inside the box for the chassis with the setting dishes as long as the body posts and bumper are not attached. Those parts, along with the servo saver, spare hardware, spur gear, spare springs, and plastic sprues are shown bagged on the right. Also shown are the letter stickers and keys that came with the Stealth Box. My chassis has clearly only ever been kept in this case and never driven. It is in pristine new condition. The first thing I did was disassemble the entire chassis and knoll out all the parts like an old Tamiya catalog photo. This was quite cathartic and allowed me an opportunity to marvel at all the unusual parts, many of which are actually unique to this model. As far as I can tell, virtually all of the carbon fiber parts are unique because the later TRF 414 changed the upper and lower chassis plates and shock towers. Attachments:
The following user(s) Liked this: stingray-63, Al
|
|
|
Please Log in to join the conversation.
Last edit: by blakbird.
|
|
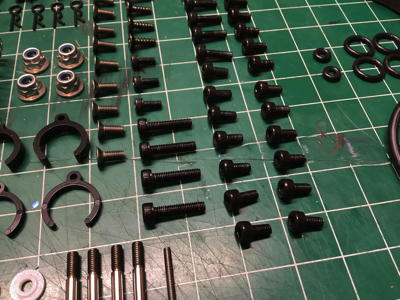
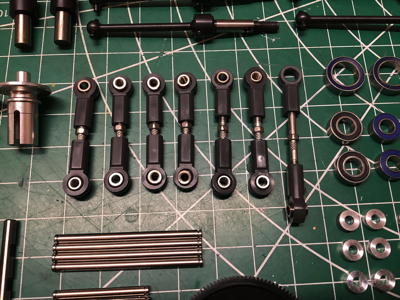
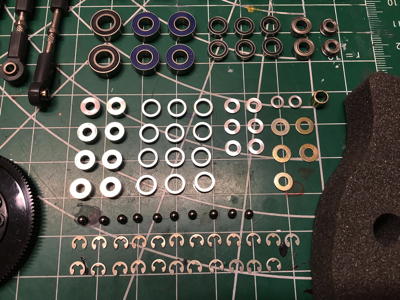
High end Tamiya models typically use button head cap screws, but in this case all of the screws which aren't countersunk have a larger standard socket head. The black socket head cap screws are mostly 3mm diameter and made from steel, while the flat head JIS screws which are used on the bottom of the chassis plate appear to be titanium (at least they are the right color for it and non-magnetic). The turnbuckles shown on the right are unusual in that they use 6mm balls rather than the much more common 5mm.
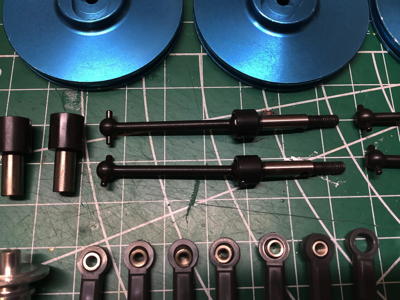
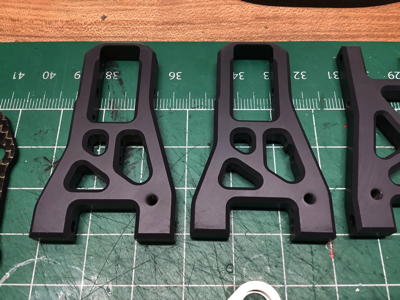
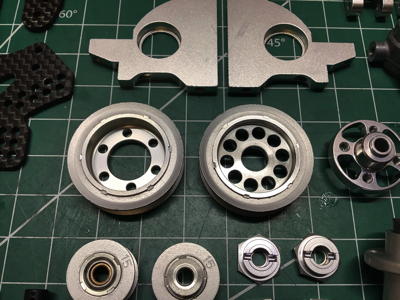
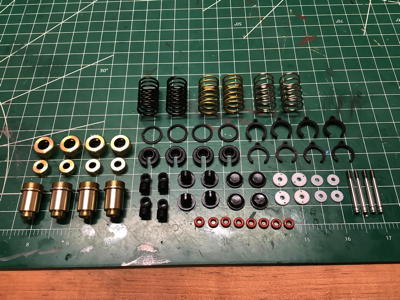
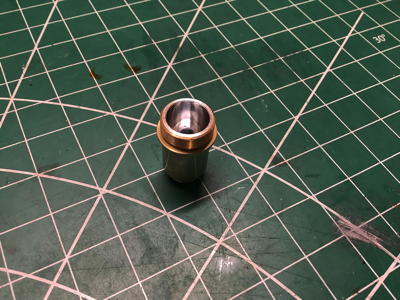
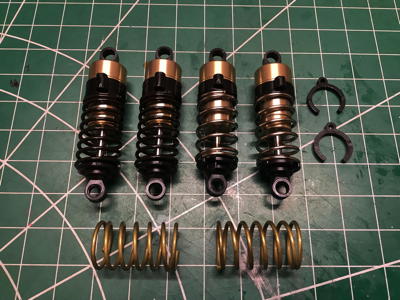
There are many different sizes of bearings and they vary from rubber shielded to metal shielded depending on whether the are installed in a protected internal environment or external and exposed to the elements. There are a wide variety of aluminum spacers. The CVD style drive shafts shown on the right use pressed pins so they can't be disassembled. The suspension arms are made from plastic (Nylon), but they are not injection molded. You can tell that they were machined from a solid block because the milling marks are visible on the surface and there is no evidence of a mold parting plane. I don't know if they did this for strength and resilience reasons or because it allowed them to prototype dimensional changes more quickly. I'd guess the latter. On the right you can see some of the machined aluminum parts. This model predates the modern Tamiya blue anodizing, so the parts all just look like bare aluminum. Even the pulleys are aluminum with staked belt shields. The shock parts are rather beautiful and also have some unique features. As you can see on the right, they are only gold anodized on the outside while the inside appears to be fluorine coated for smoothness. There are 3 different spring rate options but only 2 copies of each spring. By default the soft springs are used in the front and the hard in the rear with the gold medium springs unused. Interestingly, this is not how my copy was configured in the box. The shock bodies are not externally threaded for preload adjustment, so that needs to be done with plastic spacers (thick and thin in front, thick only in the rear). Attachments:
The following user(s) Liked this: stingray-63
|
|
|
Please Log in to join the conversation. |
|
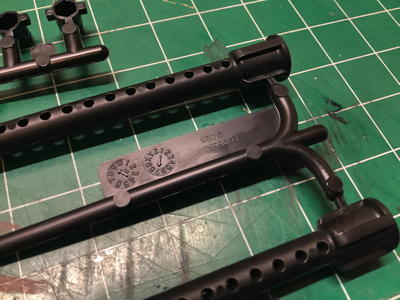
In case you thought it wouldn't be economical to develop molds for such a low production model, this label on the body posts shows that they were made specifically for the 93013 kit in July of 1999. These body posts carried forward into the later versions of the TRF 414.
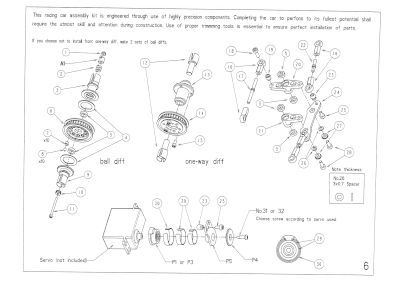
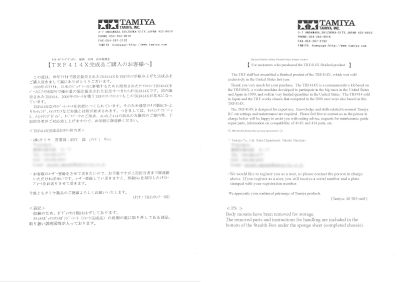
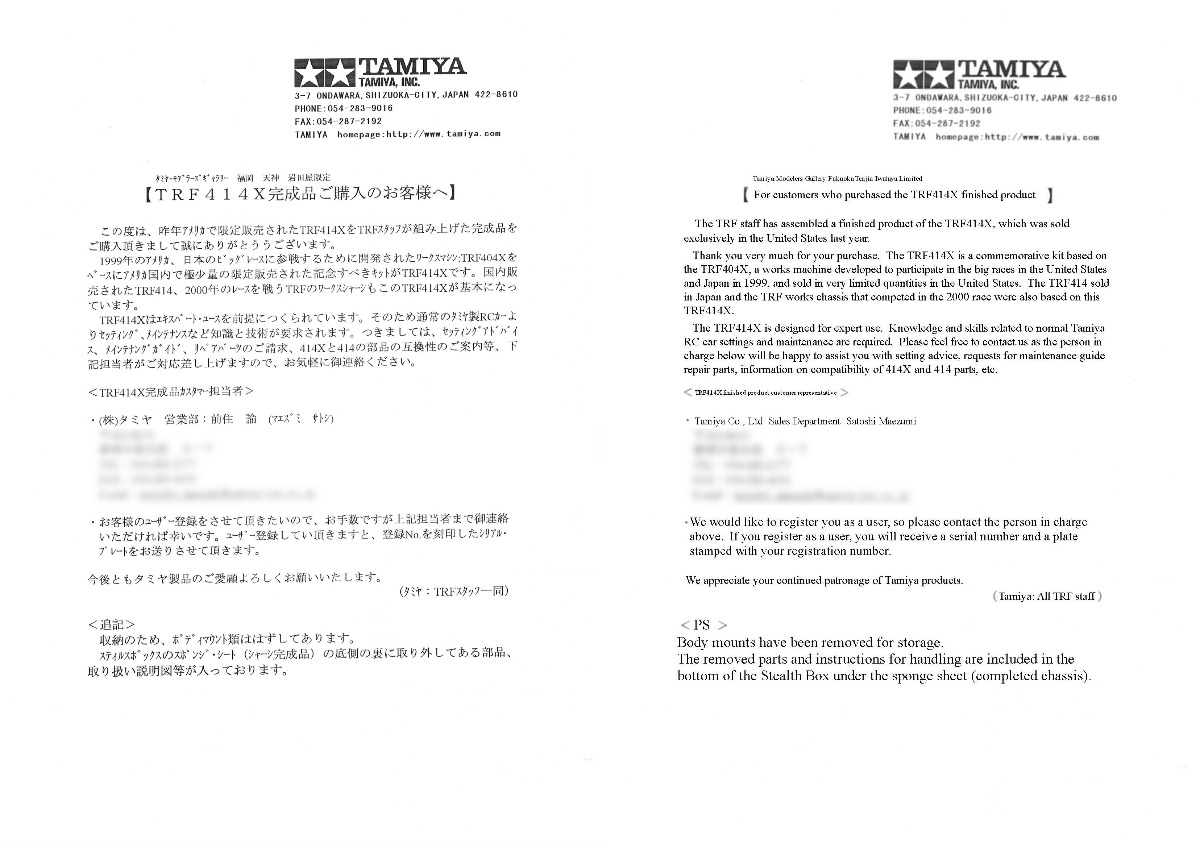
This model does not come with a build manual in the traditional sense. Instead, included are a small stack of loose papers with a parts list and exploded views of various subassemblies. A sample is shown at left. It is up to the builder to figure out the right build order and to be smart enough to know what grease and oil to use, where, and when. There is also a nice letter (in Japanese) explaining a bit about this finished model and encouraging the buyer to register it. I've included a redacted copy in both Japanese and English on the right. Note that I've provided a full copy of the " instructions " to Tamiyabase so you can go and look at the whole thing in full resolution if you like. Attachments:
The following user(s) Liked this: stingray-63, 1972 LeMansGT Jim
|
|
|
Please Log in to join the conversation. |
|
Thanks to share with us your pièce of history. And the manuals sheets.
|
|
Please Log in to join the conversation. |
|
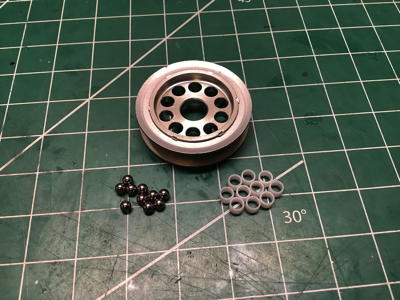
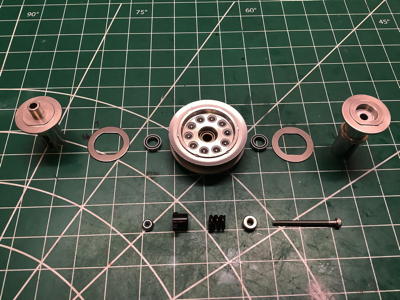
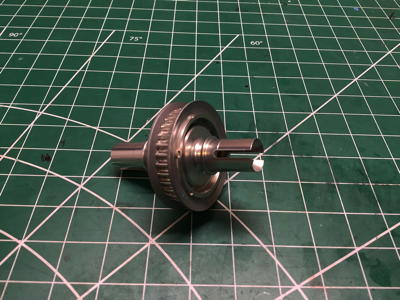
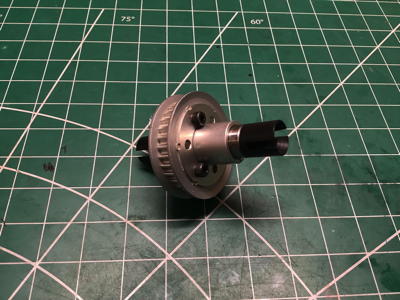
There are no traditional "steps" in the manual, but the first exploded view shown is of the ball differential. The ball diff uses ten 3mm hard tungsten balls arranged in an aluminum hub which doubles as a pulley. To avoid having the metal balls ride directly on the metal hub, each ball sits in a cylindrical Delrin insert. The pressure plates are hardened steel supported by mild steel drive cups. The thrust bearing is a swaged unit that doesn't need to be assembled. The manual says nothing about grease so you just have to be smart enough to know you need some.
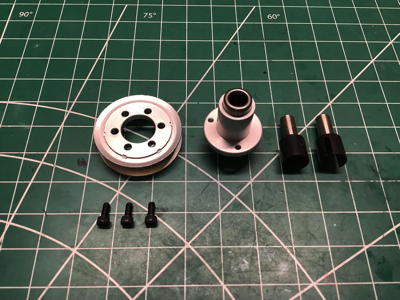
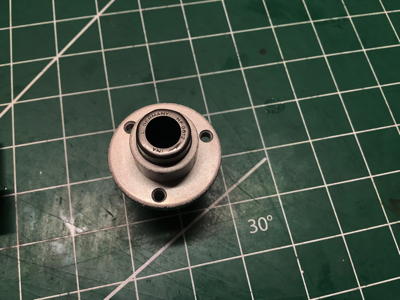
The regular TRF 414X kit came with a front one-way, but also included parts for an optional front ball differential identical to that used in the rear. Since my version came built, I do not have the second optional ball differential. The pictures below show the parts for the front one way which is built into the front aluminum pulley. If you zoom in on the photo on the right you can see that the one-way bearing part itself is from INA in Germany, uses a 6mm bore, and is pressed into an aluminum hub. There are actually two of these bearings, one pressed in from either side. This allows the left and right drive cups to spin at different rates in corners, simulating a differential.
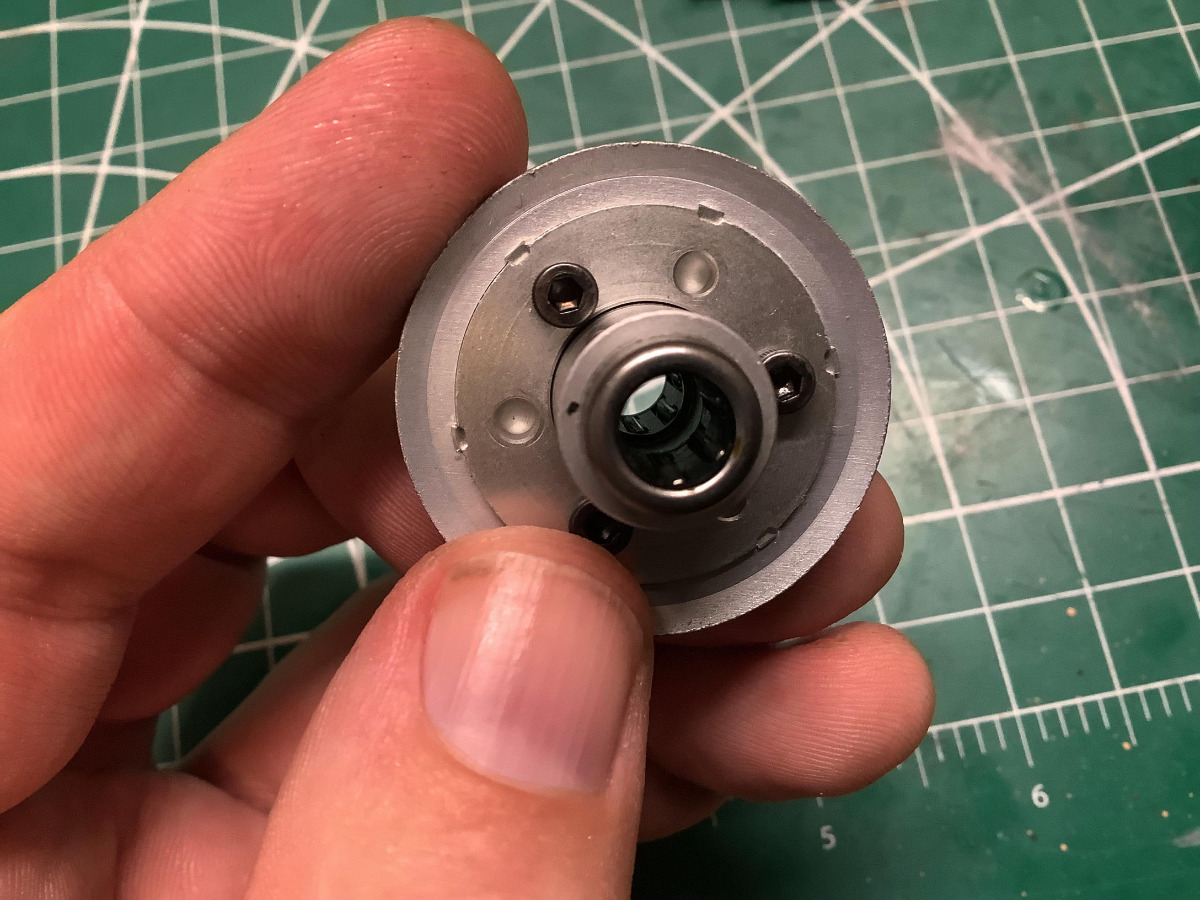
Ever wonder how a one-way bearing actually works? You'll need to zoom in on the full size photo to follow me on this one. The cylindrical needle rollers sit in an asymmetric slot. In one direction they can roll freely, but in the other direction they are forced into a hardened tang which bites into the rollers and causes them to jam against the mating shaft. Please ignore the hand model I hired for this photo.
Attachments: |
|
|
Please Log in to join the conversation.
Last edit: by blakbird.
|
|
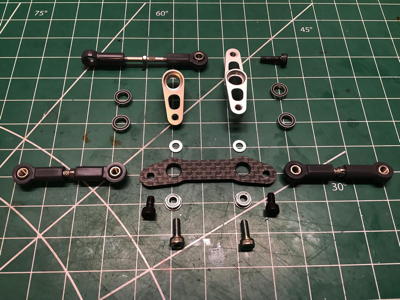
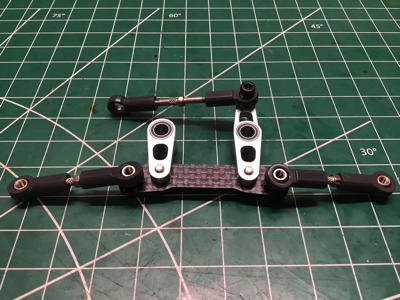
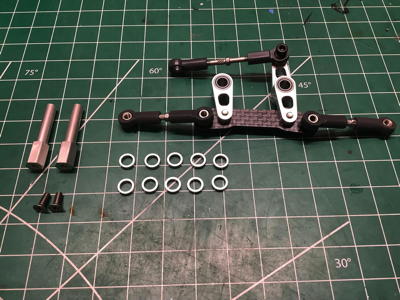
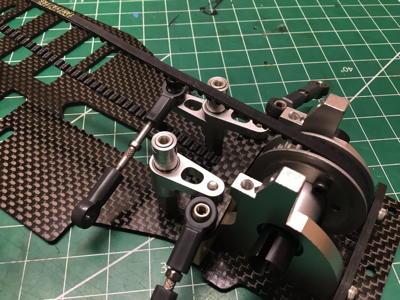
The dual bellcrank steering is designed for precision. The steering bridge is a carbon fiber plate with flanged bearing inserts The use of 0.7mm spacers makes the aluminum cranks clamp very slightly (0.2mm) proud of the bridge surface so they don't jam against it. The cranks ride on dual ball bearings.
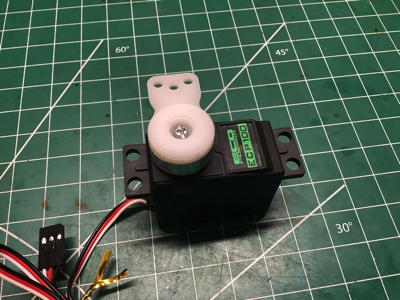
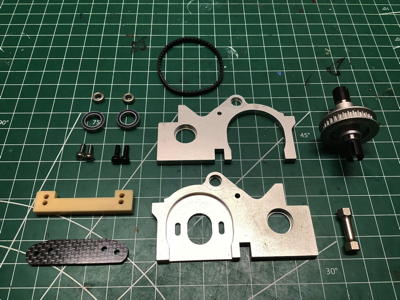
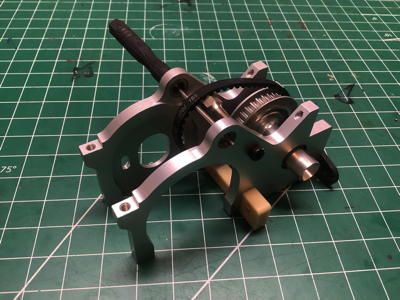
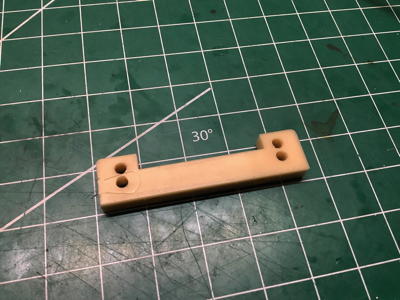
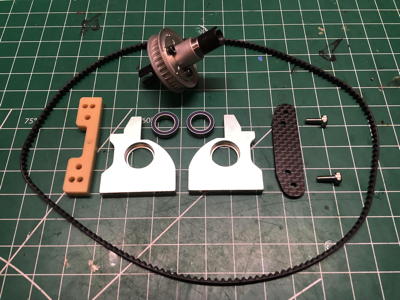
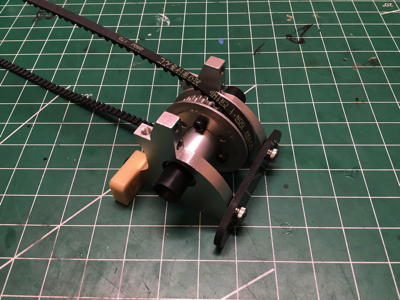
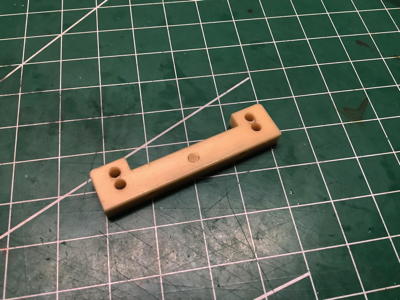
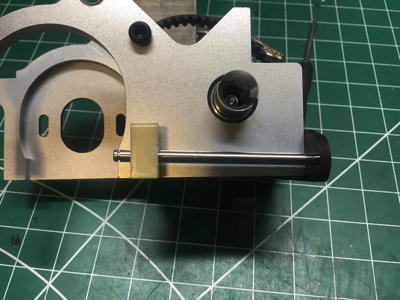
The model uses a high torque servo saver with a white Delrin servo horn. I don't plan to drive this model, but I did want to put a simple servo in place to at least hold the wheels in the right position. Time to assemble the rear bulkhead. The side panels are machined aluminum. The manual shows that these come with bearings already pressed into them, but I didn't notice that until I'd already knocked the bearings out to take this photo. Luckily I did not damage anything in the process. The rear suspension mount is a carbon fiber plate while the forward mount appears to be machined Nylon and will add lateral support to the whole assembly. The short rear belt has to be installed over the pulley now because it won't be accessible later. The motor mount plate is integral with the rear bulkhead. These photos compare the forward suspension mount from each side. Note that one side has an indentation in the middle. This feature is there to identify which direction faces forward. Why should it matter? If you look very closely, you'll see that the holes are very slightly closer to the top of the part on one side than the other. That's because the holes have been drilled at an angle that is not perpendicular to the face. Attachments: |
|
|
Please Log in to join the conversation. |
|
The picture on the left shows the results of those angled holes. The inner suspension pivot is not parallel to the chassis plate, but angles down toward the back which results in a positive skid (or anti-squat) angle. Note that the carbon rear suspension mount does not have a hole drilled at an angle, so the hinge pin needs to be wedged into it pretty tightly. I've used the default lower hole, but the roll center can be changed by using the upper hole on the front suspension mount and flipping the rear mount upside down. On the right you can see the bulkhead installed into the chassis as viewed from below. It really bothers me that two of the screws are steel instead of titanium. As far as I can tell from the manual, these ought to be all the same material. Since my version was built in Japan a year after the original release, perhaps they ran out of stock. I don't have another explanation for the swap. I was eventually able to find some replacement Tamiya 3x18mm titanium JIS flat head cap screws to replace them, but it wasn't easy (or cheap).
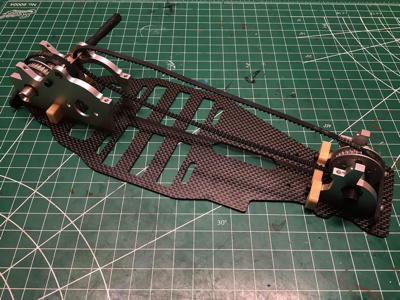
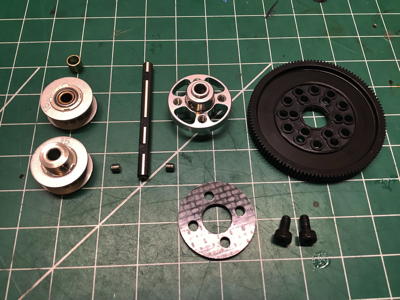
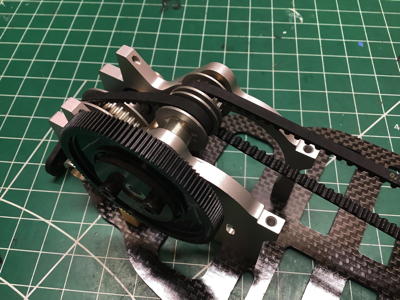
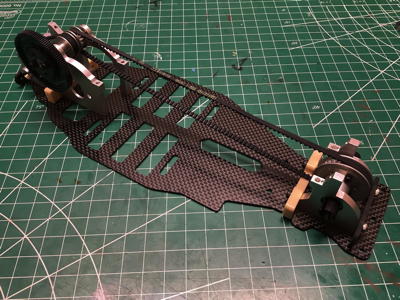
The front bulkhead assembly proceeds much like the rear except that we're using a one-way here and a longer belt. The assembled result is shown on the right. Here is the chassis with both bulkheads installed. I'm using a tool as a temporary holder for the belts until the center drive pulley goes in. This is also the first full view of the chassis plate I've shown which reveals how the batteries are configured. This chassis is set up for saddle packs with 3 sub-C cells on either side of the belt (lithium batteries were not a mainstream thing yet in 1999). Time to install the center pulley shaft and spur gear. The 93013 kit came with a 15T pulley locked to the shaft to drive the rear axle, and either another of the same or a one-way to drive the front axle. My built version only included the one-way. I've never quite understood why you need a one-way both on the center shaft and also on the axle, but this chassis has both. The carbon reinforcing plate you see here for the spur gear was not part of the 93013 kit but did come with the later 49132 TRF414 from 2000. Since my built version of the 414X came from 2000, it appears to have included this "upgrade". Note that the model that came out of the Stealth Box as built did not have the spur gear installed at all. Attachments:
The following user(s) Liked this: stingray-63
|
|
|
Please Log in to join the conversation. |
|
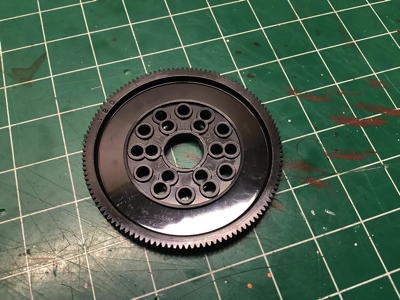
The 120T spur gear is actually not a Tamiya part. Since racers tended to use 64p pitch rather than the metric 0.4 mod equivalent, Tamiya chose to include a racing spur from Kimbrough. The center shaft is installed as shown on the right, so now the belts can be rotated and tested. Note that there is no belt tension adjustment in the hubs.
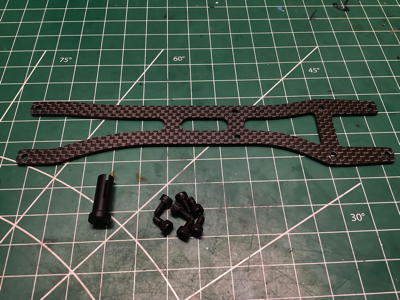
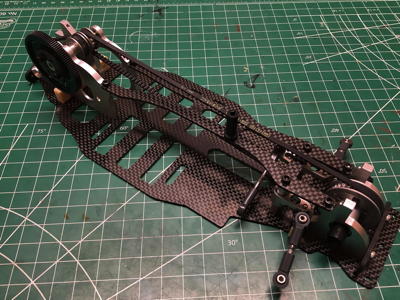
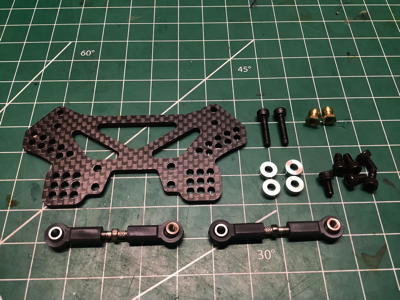
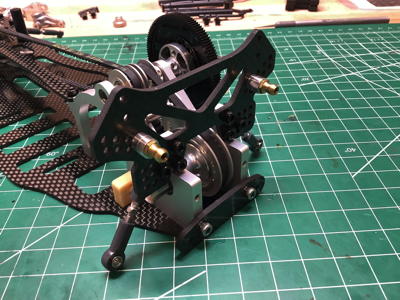
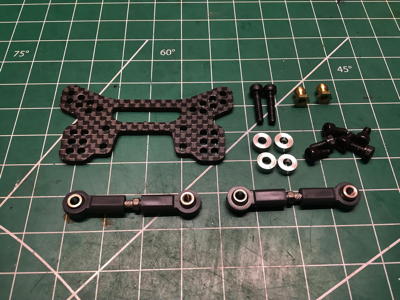
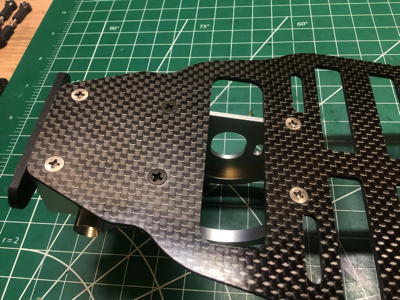
Now we can install the steering bellcrank assembly onto the chassis plate using the posts and spacers shown. In order to get the steering bridge to sit at the right height to pass between the top and bottom of the belt, all 5 spacers need to go on top of each post. Now the asymmetric upper chassis plate can be installed with a receiver antenna mount. This plate also ties the front bulkhead to the tops of the steering posts. Everything is massively stiffened after this is installed. Why is it asymmetric? I can't find any particular reason for the extra space allotted to the right side by this design. The rear shock tower comes with a lot of options. There are 9 holes on each side (arrayed in a grid) for connection of the upper suspension link, and also 9 holes on each side (arrayed in an arc) for connection of the upper shock mount. I used the holes indicated as default in the manual because I don't know any better. Attachments: |
|
|
Please Log in to join the conversation. |
|
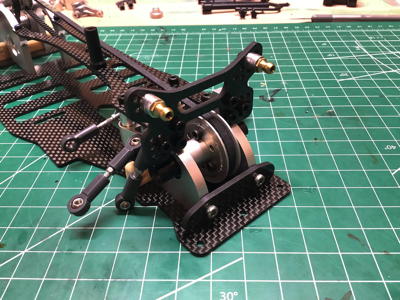
The front shock tower offers slightly fewer options for link attachments than the rear (6 or 7 at each location instead of 9), but it is still a very customizable configuration. It is shown installed on the right. Both shock towers are reused on the TRF 414 production model, but simplified for the TRF 414M with the same overall shape but fewer holes.
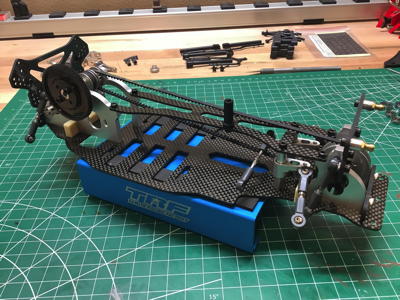
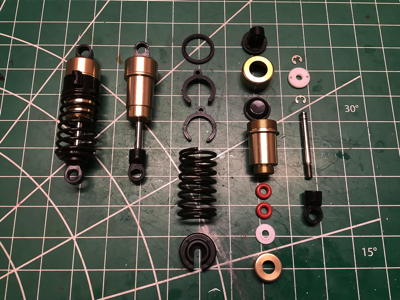
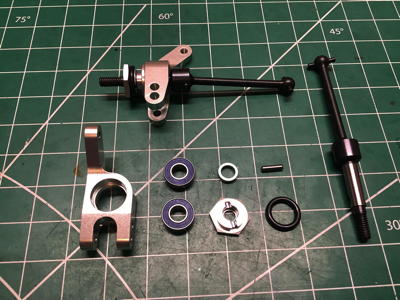
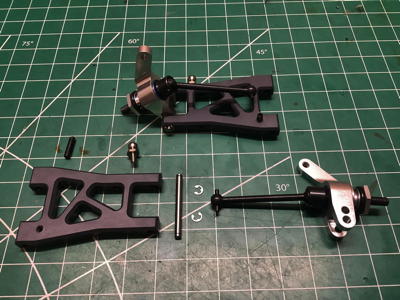
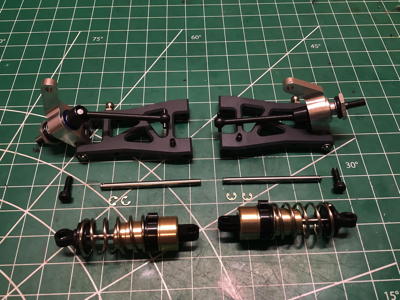
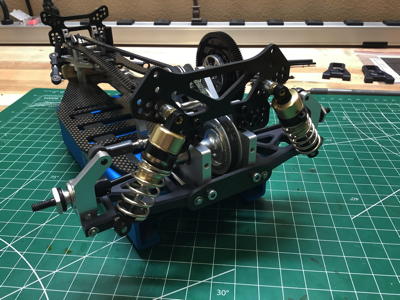
Here is the chassis with both shock towers installed onto the bulkheads. Time to build the suspension. These very early TRF shocks are a thing of beauty. The outside of the cylinders and caps are anodized in gold. All four shocks use 2-hole Delrin pistons, but front and rear versions use different spring rates and preload spacers as shown. A third spring rate which is between the other options is available but unused in the base build. The rear suspension comes first. The uprights are machined aluminum and the axles have a dogbone at one end and a CVD universal at the other. The axles come assembled with pressed pins so cannot be taken apart. The hexes are very thin and the cross pin is unusually retained with an O-ring. Once built, the hub assembly attaches to the machined suspension arms with smooth hinge pins retained by E-clips. A set screw is used to contact the chassis plate and set the lower limit of suspension travel which controls ride height. Attachments:
The following user(s) Liked this: stingray-63, 1972 LeMansGT Jim
|
|
|
Please Log in to join the conversation. |
|
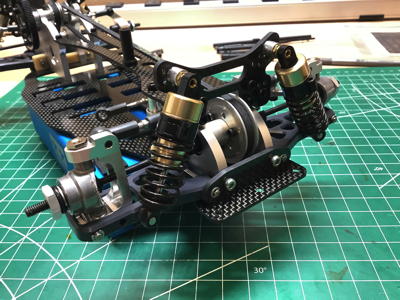
Now the previously completed rear shocks can be attached and the whole rear suspension assembly connected to the chassis with hinge pins. The fully assembled rear suspension is shown on the right.
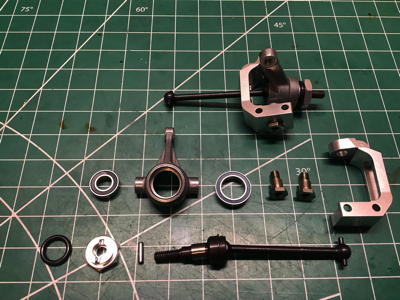
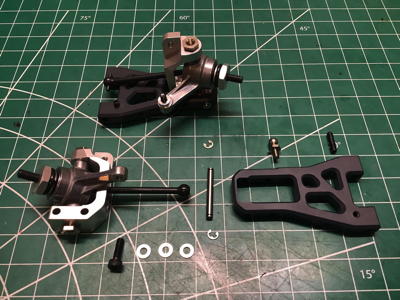
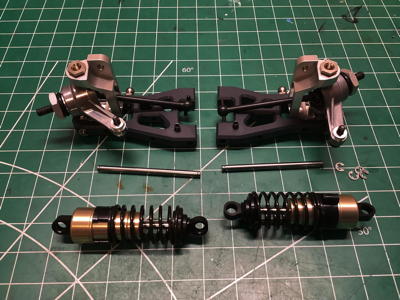
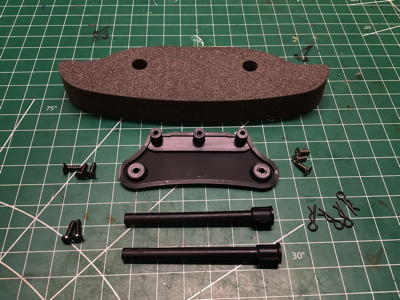
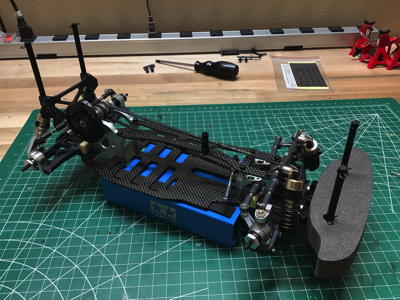
Now we can do the same thing for the front suspension. The C-hubs and knuckles are both machined aluminum. The king pins are single piece step screws with a smooth portion to act as a steering pivot. Everything else goes together very much like the rear. The exploded view on the left shows the components for the front suspension installation, and the photo on the right shows everything complete. Note that the upper arms attach to the sides of the hubs rather than the top. This keeps the arms low, but also introduces side forces into the hub. At this point the chassis has been returned to the assembly condition in which I received it, but it is not quite done. Neither the bumper nor the body posts were installed in the hard case so I'll put them on now. There's nothing out of the ordinary going on here, although these body posts are unique to this chassis. Attachments: |
|
|
Please Log in to join the conversation. |
|
|
|