|
This morning was resin session end.
I already learnt how to do better with flex resin as it is usually very long... With a standard resin, which is way more fluid, cleaning goes like a charm... 15minutes and it's done... And as usual, resin prints are so much better than anything else regarding the finish... I may actually do more resin prints in the future, as with standard resins, this is less cumbersome... I buy kits to built and ru(i)n them
The following user(s) Liked this: stingray-63, Lemsko
|
|
Please Log in to join the conversation. |
|
A new printer arrived home during the week...
Elegoo Saturn 4 Ultra The bed is bigger than the Photon M3, and this should become my main resin 3D printer. I don't know yet if I'll keep the Photon M3, as I have no clue if this big bed printer will work with flex resins, and if it is not the case, I'll keep the Photon M3 just for those... I intend to do my first prints with the Saturn 4 Ultra over the week-end... I buy kits to built and ru(i)n them
The following user(s) Liked this: Lemsko
|
|
Please Log in to join the conversation. |

|
New printer, new mistakes to make
The printer has a printing mode set by default as Fast. I indeed found that the tilt was going very quick, and the detach element was quite brutal. Part of the raft was still on the FEP (settings for the resin comes directly from resine manufacturer and they are for normal printing mode - one resin is suitable for Fast mode, but that's not what I use right now). I therefore decided to retry with normal mode, but I also changed the slicing to include another part : the target is to print the Hunter prototype roll cage with monoshock option in two parts. I used auto-orientation, and heavy supports (it may work with medium supports, but I'm not tempting right now). The resin is Sirayatech Blu Obsidian Black (nylon like resin). I buy kits to built and ru(i)n them
|
|
Please Log in to join the conversation. |
|
I have decided my next printer will be Bambus Lab A1.
Need to save up. This time I want a printer that works!
The following user(s) Liked this: silvertriple
|
|
|
Please Log in to join the conversation. |
|
Multiple fails...
Cumulating new printer, new resin, new slicer (Chitubox in version 2 is slightly different than V1). this makes the thing slightly more difficult. The resin is not an easy resin, and I start to suspect the tilt makes orientation of parts slightly more difficult... I resliced my parts, reviewed the supports and i'm retrying again... This is a bit frustrating, but that's part of the learning curve... I buy kits to built and ru(i)n them
|
|
Please Log in to join the conversation. |
|
This time it is a success. I changed the supports settings accordingly to some tricks I found on a the sirayatech user group on facebook, added a few supports just to be sure, and it worked...
I removed the supports and put the parts in the cure station after cleaning... I'll put some smaller parts now. I won't have a time lapse, because the parts I'm going to print are not that big I buy kits to built and ru(i)n them
|
|
Please Log in to join the conversation. |
|
As mentioned earlier, I have the intention to put the Nylon like resin to the test...
Those parts are quite hard in FDM because there is no ideal orientation... Theorically, SLA is much better in Z, so it may be a very good use case for this. I printed a few set in order to ensure that if I snap one, I can still change it and get back to run. That will be most likely the only parts printed for the Mercury 4xi beside the rims... I buy kits to built and ru(i)n them
|
|
Please Log in to join the conversation. |

|
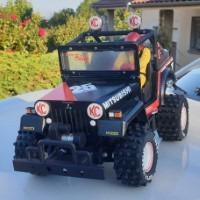
While spending the afternoon to change the bumper of my daughter's car, I face a small problem of tooling. There is no way I can find a drill bit of 19mm diameter, and even the cones I have go by step of 2...
I tried to play with a file and that did not work out. I decided to drill a bigger hole taking benefit of the cone, and to adapt a mount for the rear view camera... The adapter is going to be in 2 pieces : one of the right diameter to insert the camera and this part will be inserted in the bumper. There will be a thread so I have a ring with the opposite thread to fix the part... I'll launch a 25 minutes print after the current print is finish and this will be solved (hopefully I buy kits to built and ru(i)n them
|
|
Please Log in to join the conversation. |

|
I buy kits to built and ru(i)n them
The following user(s) Liked this: stingray-63
|
|
Please Log in to join the conversation. |