Keyword
  • Page:
  • 1
  • 2

TOPIC:

Playtron Lynx & Dorbeman - let's CAD again :) 2 years 3 months ago #78916

I got the diff ready for next steps...


Then I focused on the rather simple gearbox. The left side first...


Once this was done, I did the right side... Which includes fixation for the 4WD variant power output...


Once that was done, it was time to do some assembly...


I still have to do the motor pinion, but I have no clue what was on the Doberman initially, as it came incomplete. I will have to dig in the details once I open the Lynx...
I buy kits to built and ru(i)n them :-)

Please Log in to join the conversation.

Playtron Lynx & Dorbeman - let's CAD again :) 2 years 2 months ago #78978

The chassis of the Playtron is a space frame. There is two (almost) symetric sides. I decided to start by the right side and to derive the left from there...

The bottom and the rear are used as reference points...


Then we add the rest progressively...


I may not have done it in an optimal manner, but here is the right side...


Then I made a symetry, and played "find the errors" to correct them (left side was 3 minutes of work)


The key chassis part is done, there is still a lot of parts to deal with... But it is a good start...
I buy kits to built and ru(i)n them :-)

Please Log in to join the conversation.

Playtron Lynx & Dorbeman - let's CAD again :) 2 years 2 months ago #78979

The work continues...

The front end is super easy...


Next will be the arms...


I decided to start by the rear arm. It's a bit complex. Initially I started by defining the surface and started to work this out in solid mode...


When I was there, I thought this would go nowhere, and decided to play it with surfaces... I started to define the surface I needed, with the idea I would used them to define 2 different solids. One to remove what was to be removed...


And one to add what was missing after that...


Once this was done, there was some remaining work, and everything can be done in solid mode for what remains (using a bit of boolean, still, but...)...


And here is the rear right arm of the car


I buy kits to built and ru(i)n them :-)

Please Log in to join the conversation.

Playtron Lynx & Dorbeman - let's CAD again :) 2 years 2 months ago #78980

Front arms are actually easy parts to put in CAD...


Once that was done, I played with joints in Fusion360, and that helps to debug the few elements where it was required... (Front top arms were half millimeter shorter than what they should be, and the shock lever fixation too short of a millimeter).
Quick reminder on how I do : front arms are in a linked files, both files are opened in Fusion 360. I modify the sketch definition of the arms on one side, record the file, and get the file content updated on the other one and boom, it's done. And this way doesn't require much to play within the timeline, which could be quite confusing in some cases otherwise...


Remains to do for the Doberman :
- bumper
- steering servo and tie rods setup
- motor and motor heatsync
- shocks

For the Lynx : will remain : front gearbox, center shaft, front rims and front shafts (knuckles and arms are common)

And the bodyshell, eventually...
I buy kits to built and ru(i)n them :-)

Please Log in to join the conversation.

Playtron Lynx & Dorbeman - let's CAD again :) 2 years 2 months ago #78982

Shocks are in. I analysed in detail the front shock, and derived the rear without opening them....


Next was to get them on the chassis...


For those who opened a NIB of Playtron Doberman, beside the few parts still missing (bumper, motor, heatsync and wheels), that was more or less the way you ccould find the car in the box...
I buy kits to built and ru(i)n them :-)

Please Log in to join the conversation.

Playtron Lynx & Dorbeman - let's CAD again :) 2 years 2 months ago #78985

The Bumper is quite easy using some boolean... It consists of a profile extruded and cut from the top projection, and another profile also cut from the top projection...


I quickly added it to the chassis...


Then I decided to bring a RS-540-SH into the build... And I then noticed that the motor is not a 540 out of the box (Diameter of the cage is 35mm). I reveiwed the design of the gearbox to reduce the thickness around the motor as I did assume initially it was everywhere 2mm (it's not the case as if it was, there was no way to fit a 540 motor)...


My Doberman did not have its heatsync, I had to ftech the NIB lynx to take the measurement. I made it for the 540 and not the original motor...


The impact of the different motor impacts also the pinion, as it needs to be shorter to line up with the spur gear while using a 540...


I will have to dig into the Lynx details next, as the steering servo support was not present with the Dobermann, as well as the servo saver...
 
I buy kits to built and ru(i)n them :-)
The following user(s) Liked this: stingray-63

Please Log in to join the conversation.

Playtron Lynx & Dorbeman - let's CAD again :) 2 years 2 months ago #78988

Since I started to digg in the Lynx, it was now time to get into it, for real.

I disassembled the front gearbox to see what was inside...


I started to reproduce the gear set. Gears are module .8 (11T/30T), and bevel gears are 12T module 1 (the same are used at the rear). The most difficult was to find the module, and the bevel gear definition (but again, not my firsts, and once you have the right module, and the cone, this is easy, specially when they are like this).


The front of the gearbox is a derived of the front end of the 2WD version...


The position of the shaft center is also used to define the position of the main gear, using center distance and one measure taken on the part...


I then did the same work at the rear...


And we have the full transmission in for the 4WD version


I cheated a bit for the 4WD assembly as I just pull my transmission, hiden the 2WD parts, then one single joint, plus the change of the front wheels, shaft and dogbones addition and boom, voilà..


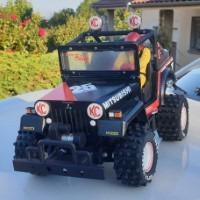
The front wheels have one ways since there is no diff. For the sake of mentionning it, there is no one way of the proper dimension in the database within Fusion, so I just figured out a arrow on a extruded part to figure it out (we don't see it anyway, but that's for the sake of saying there is some oneways in the front wheels)... WHile having the car in my hand, also went in the kitchen to weight the car : 1000g without steering servo, RX, ESC and bodyshell... it may be lighter than the Marui Samurai...
 
I buy kits to built and ru(i)n them :-)

Please Log in to join the conversation.

Playtron Lynx & Dorbeman - let's CAD again :) 2 years 2 months ago #78989

Now the chassis are almost done, looking at the bodyshell, it's quite simple : mostly flat panels...

I started to put the data in for the profile line...


Then, I assembled some surfaces together...


And soon, I had a bodyshell... (NB: it's only a surface, but I could eventually make a mold from it, just closing the surface with a bottom - I tried to do it and shell it, but that won't work)


Next was to add a wing. I did a simple one (it may not be inline with the actual model, as the model I used to do it only have the center part... 

Here is the Doberman


And here is the Lynx
I buy kits to built and ru(i)n them :-)

Please Log in to join the conversation.

  • Page:
  • 1
  • 2
Moderators: caprinut, stingray-63, AndyAus
Time to create page: 0.124 seconds

