Keyword
  • Page:
  • 1

TOPIC:

Blakbird's 58500 Sand Rover Build 5 years 7 months ago #65281

  • blakbird
  • blakbird's Avatar Topic Author
  • Offline
  • Impressive Numbers
  • Impressive Numbers
  • Posts: 1426
  • Likes received: 1282
The Myers Manx was a beach buggy produced from modified VW Beetle chassis in the late 1960's.  The 58024 Sand Rover was released by Tamiya in 1981 and, while it says nothing about the Myers Manx on the packaging, was clearly intended to be one.  It was 30 years later in 2011 that this kit was re-issued as 58500 with a totally new chassis.  I am not usually a fan of complete chassis changes, but the original chassis was very limited so in this case I think the DT-02 was a much better choice.

The original used a simple bathtub chassis, trailing arm front suspension, swing arm rear suspension, no dampers, a 380 sized motor, and most importantly an exposed gear set.  These gears would immediately get debris in them and destroy themselves.  The modern DT-02 chassis has nothing in common with the original except the motor.  It uses four wheel double wishbone suspension and a fully enclosed gearbox with open differential.  It also uses friction dampers but I replaced those with oil filled CVA shocks.  Those notches you see in the hood for the shocks were not present in the original are the only immediately obvious difference in the body which was probably made from the original molds.

You can tell this is a relatively modern chassis because it drives very well.  I'm not even afraid to jump it.  The body is fragile of course, so some caution is needed but mostly you can bash this like any other Tamiya buggy.  It is much wider than the original which offers better stability but less scale looks.

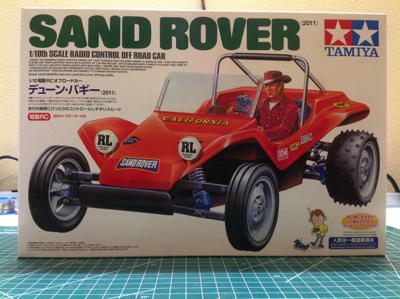
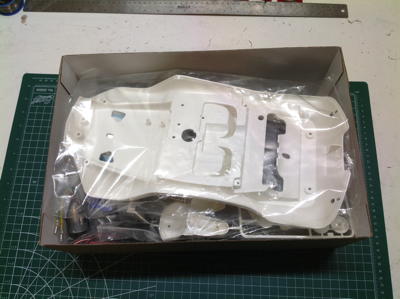
The art on the Sand Rover box mimics that of the original box, but the changes to the track width, shock locations, and stickers have been incorporated so it is clearly the re-released version.  The picture on the right shows the contents of the box which are dominated by the hard shell body.
   

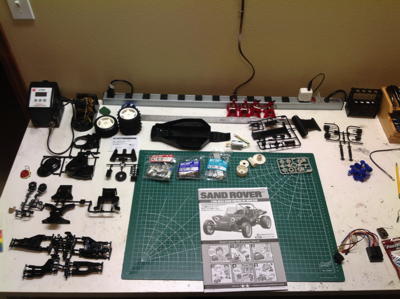
This is a pretty simple model as you can see by the relatively small number of parts.  One oddity that is not so obvious from the picture is that this instruction manual is a different size than all the others.  It is larger for some reason and therefore does not fit in my file cabinet.     
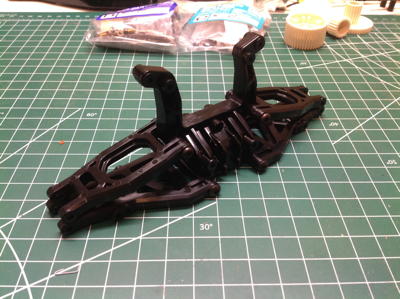
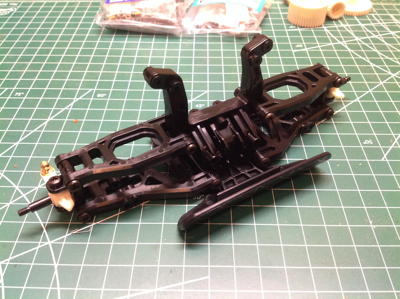
The chassis build starts with the front suspension module which can be completely built apart from the chassis tub.  Both the upper and lower suspension arms are sturdy wishbones and the shock tower is tall.  The front bumper is integrated into the suspension module.
   
    
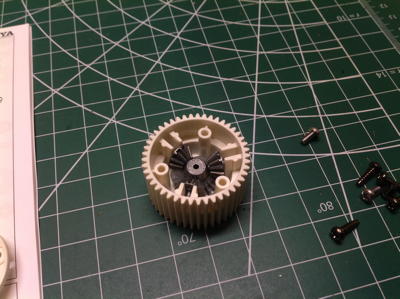
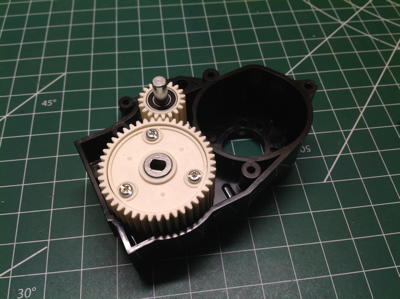
The open rear differential sits inside a very large housing as shown.  The outer spur gear mates with a much smaller counter gear.  The kit did not come with ball bearings, but I added them during the initial build as usual.
   
Attachments:
The following user(s) Liked this: jord001

Please Log in to join the conversation.

Last edit: by blakbird.

Blakbird's 58500 Sand Rover Build 5 years 7 months ago #65282

  • blakbird
  • blakbird's Avatar Topic Author
  • Offline
  • Impressive Numbers
  • Impressive Numbers
  • Posts: 1426
  • Likes received: 1282
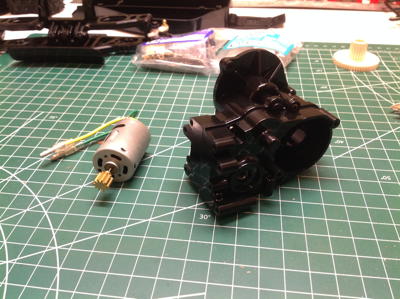
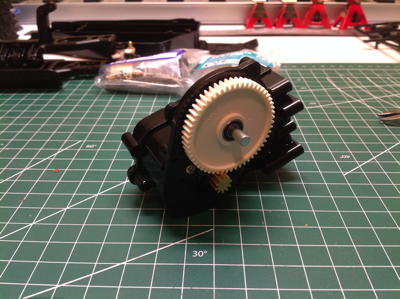
Just like the original, this kit comes with only a tiny 380 sized motor.  It can accept a 540 motor as an upgrade.  The small brass pinion is pressed onto the shaft and is not intended to be replaced.  The picture on the right shows the installed motor and spur gear.
   

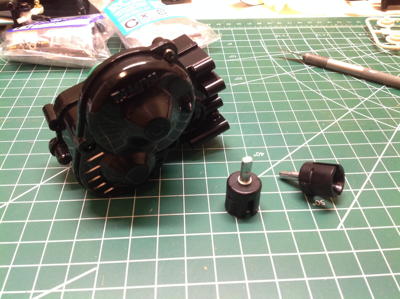
Once the gearbox cover is installed as shown, the drive cups can be installed.  These are interesting parts with metal shafts molded directly into the plastic cups.
   

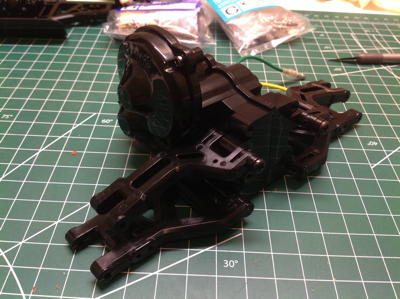
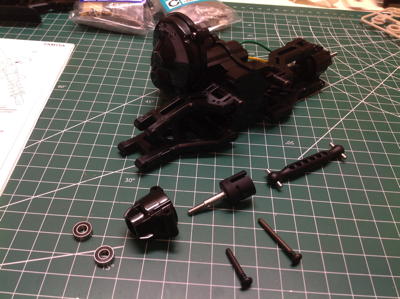
Now the upper and lower wishbone arms are attached to the rear gearbox assembly with pivot pins.  The axle is a plastic shaft with metal pins as shown.
       

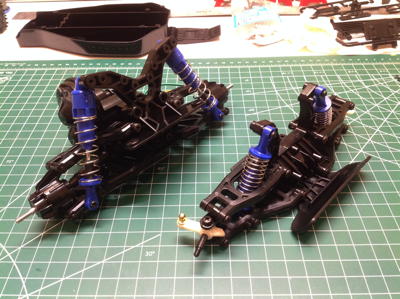
This kit comes with the dreaded friction dampers, but the included rubber sleeve actually does a semi acceptable job of providing some resistance to motion.  Note how much longer the rear shocks are than the front.  The picture on the right shows the completed suspension assemblies with shocks installed.
   
Attachments:
The following user(s) Liked this: jord001

Please Log in to join the conversation.

Last edit: by blakbird.

Blakbird's 58500 Sand Rover Build 5 years 7 months ago #65283

  • blakbird
  • blakbird's Avatar Topic Author
  • Offline
  • Impressive Numbers
  • Impressive Numbers
  • Posts: 1426
  • Likes received: 1282
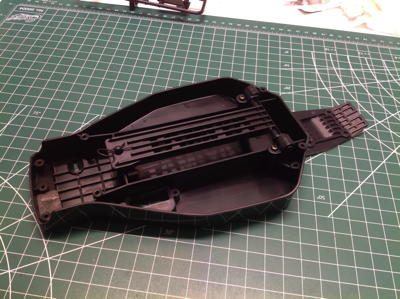
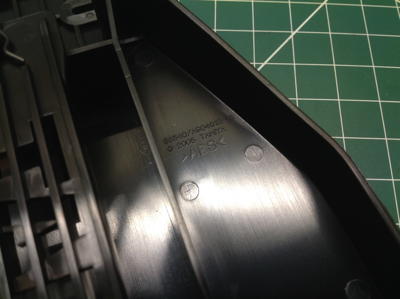
The main chassis is pretty much just a single tub part.  The battery cover sits on top and hinges at the rear.  The chassis is made from ABS (acrylonitrile butadiene styrene).
   

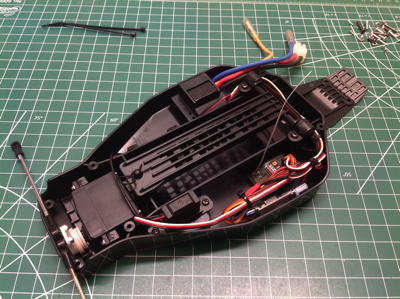
Next the electronics are installed which is pretty easy.  I happened to have an ancient TEU-101BK ESC for this model which does not have an internal BEC so I had to add one.  The steering servo drives the steering links directly as shown.  There is still plenty of room to spare.     
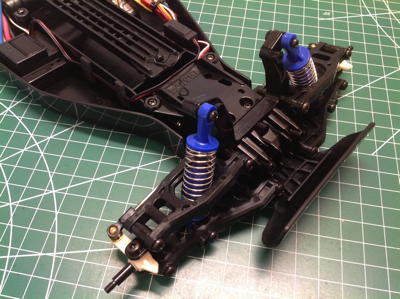
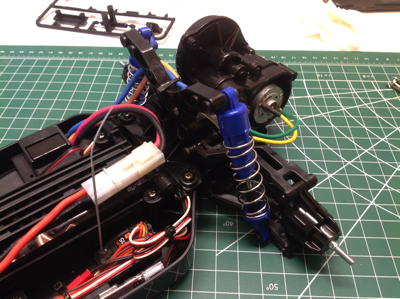
Now the front and rear suspension modules are simply screwed to the chassis tub.
   

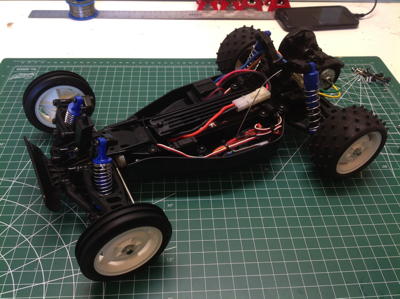
The chassis is completed by installing the wheels and tires.  This is a very sturdy chassis.
Attachments:
The following user(s) Liked this: stingray-63, Al, 1972 LeMansGT Jim, jord001

Please Log in to join the conversation.

Last edit: by blakbird.

Blakbird's 58500 Sand Rover Build 5 years 7 months ago #65296

  • blakbird
  • blakbird's Avatar Topic Author
  • Offline
  • Impressive Numbers
  • Impressive Numbers
  • Posts: 1426
  • Likes received: 1282
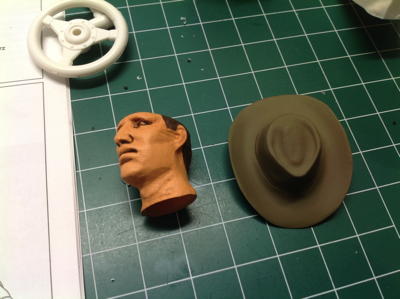
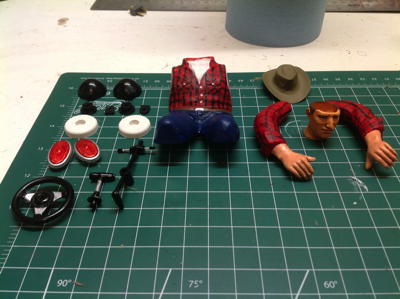
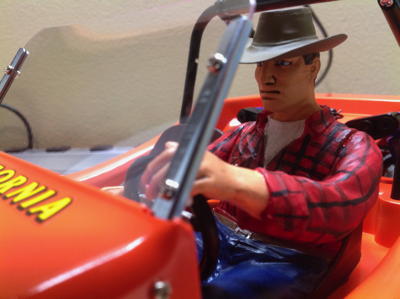
The driver's face and hat come prepainted with this kit, but nothing else.  In the picture on the right I've sprayed the body in orange and then test fit all the other unpainted parts.
  

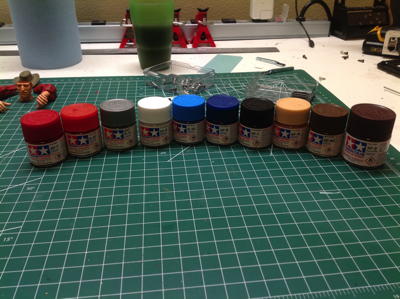
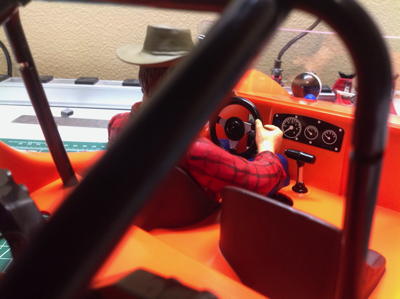
You might think that this would be a pretty easy single color paint job, but you'd be wrong.  I needed all the colors shown above, many just for the driver.  I decided to try painting a flannel shirt and jeans.  I also used trans red for the tail lights and aluminum for bits of the steering wheel and levers.
   

I painted the seats by hand and sprayed the roll bar and lights.  The windshield is supported by little metal brackets and itself is just a sheet of Lexan.
   

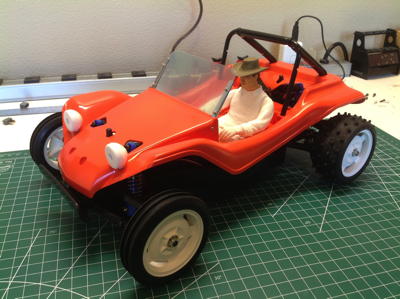
There are a few stickers for the dash as you can see on the left.  The right shows the completed driver attached to the buggy.
   
Attachments:
The following user(s) Liked this: stingray-63, 1972 LeMansGT Jim, jord001

Please Log in to join the conversation.

Last edit: by blakbird.

Blakbird's 58500 Sand Rover Build 5 years 7 months ago #65297

  • blakbird
  • blakbird's Avatar Topic Author
  • Offline
  • Impressive Numbers
  • Impressive Numbers
  • Posts: 1426
  • Likes received: 1282
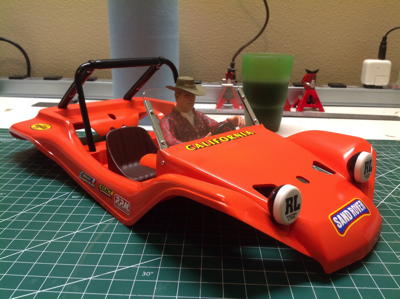
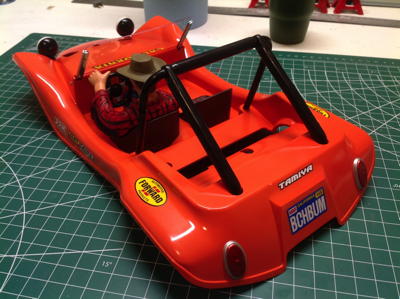
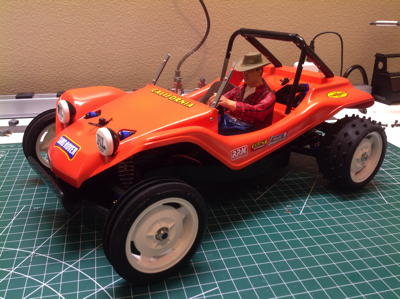
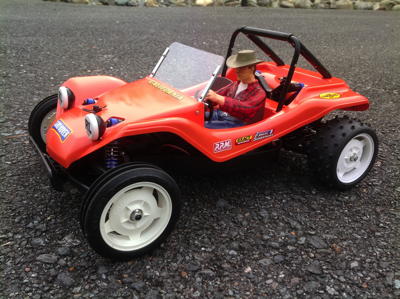
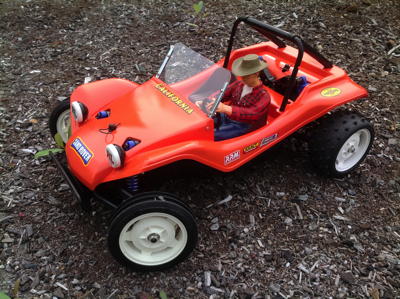
Et voila!  I think it looks pretty good even though it is much wider than the original.
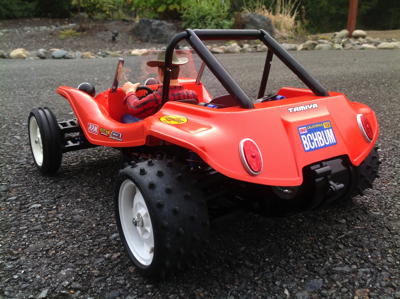
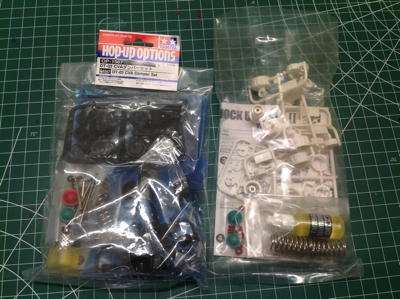
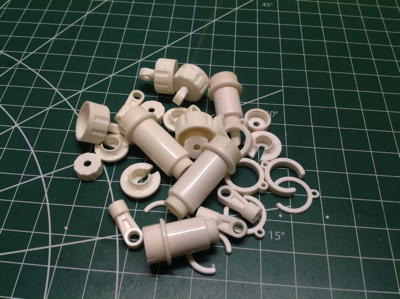
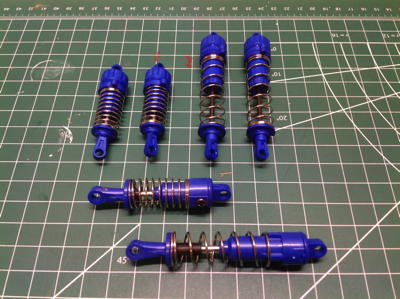
Although I was generally pleased with the performance of this chassis, I could not abide the friction dampers.  Replacing them with equivalent blue oil dampers is not easy though.  I purchased a set of DT-03 black dampers to use for hardware and then a couple different sets of white shock bodies in the right sizes from other models.
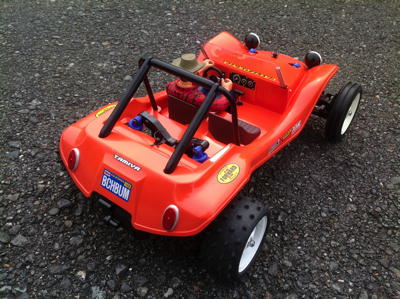
   

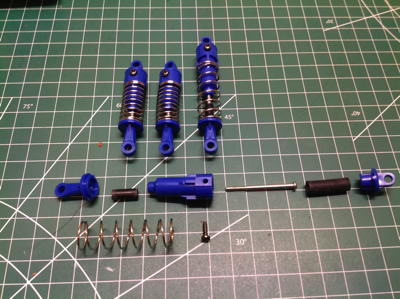
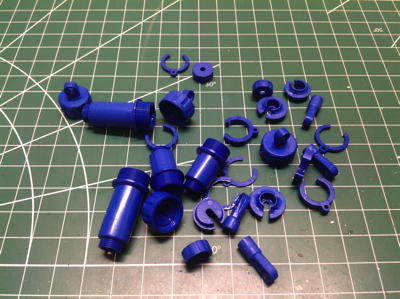
I then used blue RIT dye to change the color of the Nylon shock bodies.  This process is explained in my description of the upgrades I did on the  Mad Fighter .  The picture on the right compares the 4 new shocks (above) with two of the old shocks (below).  Not a bad match.
   

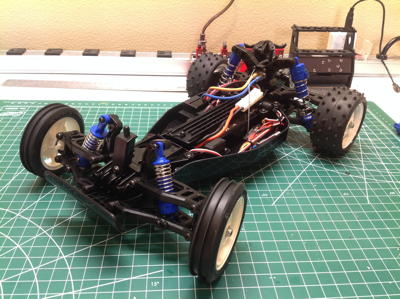
Here the upgraded shocks have been installed.  Note that the front shocks must be installed upside down.
Attachments:
The following user(s) Liked this: stingray-63

Please Log in to join the conversation.

Last edit: by blakbird.

Blakbird's 58500 Sand Rover Build 5 years 7 months ago #65299

  • blakbird
  • blakbird's Avatar Topic Author
  • Offline
  • Impressive Numbers
  • Impressive Numbers
  • Posts: 1426
  • Likes received: 1282
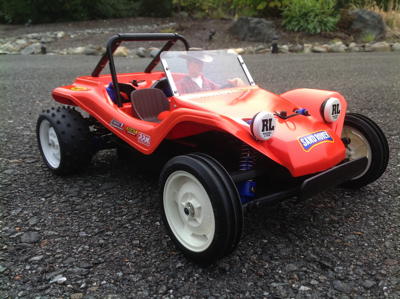
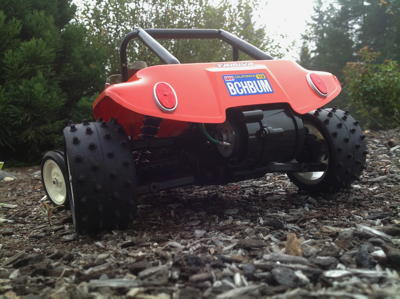
Even though the chassis bears no resemblance to the original and is much wider, I still think this beach buggy turned out looking really good.  Now I just need a beach.


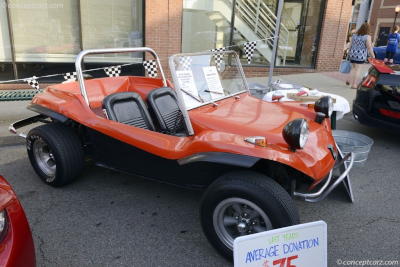
Here is a real Myers Manx for comparison.  I think the model is a very good likeness.
   
Attachments:
The following user(s) Liked this: Edou, 1972 LeMansGT Jim, jord001

Please Log in to join the conversation.

Last edit: by blakbird.

Blakbird's 58500 Sand Rover Build 5 years 7 months ago #65302

Pretty nice bug . You did a nice work on the pilot. The dt02 is very fun to drive. And it supports brushless motors. 
The following user(s) Liked this: jord001

Please Log in to join the conversation.

Blakbird's 58500 Sand Rover Build 5 years 7 months ago #65307

Wow, really nice paint job on the driver 

And usual, it's always a pleasure to read your build threads and see a perfect job.

 
Proud owner of the Bruiser Family
The following user(s) Liked this: jord001

Please Log in to join the conversation.

Blakbird's 58500 Sand Rover Build 5 years 7 months ago #65314

Nice work :)
The following user(s) Liked this: jord001

Please Log in to join the conversation.

Blakbird's 58500 Sand Rover Build 5 years 7 months ago #65369

  • blakbird
  • blakbird's Avatar Topic Author
  • Offline
  • Impressive Numbers
  • Impressive Numbers
  • Posts: 1426
  • Likes received: 1282

Pretty nice bug . You did a nice work on the pilot. The dt02 is very fun to drive. And it supports brushless motors. 

Thanks!  I can’t imagine putting a brushless in a Sand Rover.  Well, I guess I am imagining it now

Wow, really nice paint job on the driver 

And usual, it's always a pleasure to read your build threads and see a perfect job.


The driver was painful but I am happy with the result. Thanks for the encouragement. 
The following user(s) Liked this: jord001

Please Log in to join the conversation.

  • Page:
  • 1
Moderators: caprinut, stingray-63, AndyAus
Time to create page: 0.225 seconds