|
My Mugen Mercury chassis was damaged at the rear end. I found a NIP with the 2 chassis halves, and took it, and I will rebuild the car using it. The Mercury I had for some time is back in his owner hands.The right spindle was broken on mine. And my friend had only left spindles. And while someone sent me a set with the right spindle, I gave the set to my friend as a contribution for given me the honnor to model the car. I printed spindles using Nylon-Like resin (Siraya Tech Blu Obsidian Black), and I have the intension to use them for this car, and to put them to the test.
I started to remove everything from the original chassis to put it on the new chassis.The build starts by the motor plate and part of the center diff Next you complete the center diff. I put the belts already, as the rear one could be difficult to push in after the center flanges of the center diff. Next you complete the gearbox... Something to note : I don't think the spur gear will last long. I may need to find a solution. Looking at the way the spur gear is, no fancy motor here. A plain old sliver can. The gearbox cap is another new part... Both front and rear diff and associated setting excentric rings are brand new as well. I just noticed while mounting the right spindle on the right arm that I'm missing some of the bushings... I've ordered ball bearings to replace them... They will take a lot of time to come, but that should give me plenty of time to sort the rims/tires topic out : i'm not sure I'll change the axles, although that might be an option (I checked what I have here, and nothing fits perfectly, and while I have the information that i would work with some DF3 swinsghafts and axles, it would also require me to change the diff cups by something difficult to find nowadaysà... Anyway, this build was started but is now on hold... I buy kits to built and ru(i)n them
|
|
Please Log in to join the conversation. |
|
I buy kits to built and ru(i)n them
|
|
Please Log in to join the conversation. |

|
I have no proper wheels for this car... And although I have the model of the Mercury rims, I don't like them. Further the driver is 14mm axis with a very large axle...
I have few options : Last option appears to be the quickest on my side, and looking at the way the hubs are on this car, it is likely that I would have to print rims anyway... I decided to design rims with the same offset as the original ones, and here is the design : it's a very simple one, and I did also design front rims a bit narrower, as the target is really to use very standard 4WD 2.2" tires... I'll have to print the rims very soon... I buy kits to built and ru(i)n them
The following user(s) Liked this: stingray-63
|
|
Please Log in to join the conversation.
Last edit: by silvertriple.
|
|
The chassis assembly moved a bit... I used non branded shocks I found on Aliexpress and they seem to be of a good quality...
The rims are printed, but I want to review a small detail: the hex room a bit too tight... Remains to do : RX and ESC implementation, then it will be time to deal with the custom bodyshell... I buy kits to built and ru(i)n them
|
|
Please Log in to join the conversation. |
|
I buy kits to built and ru(i)n them
The following user(s) Liked this: stingray-63
|
|
Please Log in to join the conversation. |
|
I buy kits to built and ru(i)n them
The following user(s) Liked this: stingray-63
|
|
Please Log in to join the conversation. |
|
The Mercury 4Xi came with a key for the wheel nuts. They are bigger than what we found usually on 1/10 EP cars. And it's damaged.
I solved this with a very simple but effective print... Next part is the paintjob. Something simple is on the card. I used some masking tape to try to define the windows format, and I will scan it and cut some masks from that... For anything else, the plan is to do something very simple... I buy kits to built and ru(i)n them
|
|
Please Log in to join the conversation. |
|
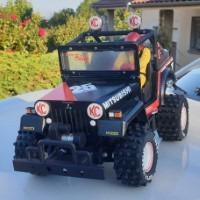
Spent this morning to deal with the paintjob...
Fluorescent red, white stripe, black and smoke for the window. Quick reminder : this is not an original bodyshell, it is based on an approximative CAD model, mold was printed and the bodyshell was vacformed by a friend (I may have to work out a better bottom line for the mold, as it appeared difficult to read on the bodyshell, and you can see on the pictures the way I trimmed the body is far from perfect)... The car is just missing body clips and it is be ready to run... I buy kits to built and ru(i)n them
|
|
Please Log in to join the conversation. |
|
One of the Australian vintage bashers contacted me as he would like to get some parts for his car. At the very exception of the spindles, wheels, and metal motor plate, I have not tested anything yet on this car.
My chassis should not be that far off based on what I can see with the bodyshell, but I'll have to test it anyway. In the meantime, I decided to start dimensionnal testing on the arms and shock towers... I've launched a print, we'll see how it looks like in comparison to the reality... I buy kits to built and ru(i)n them
|
|
Please Log in to join the conversation. |
|
I love my X1C, slice, print, test!
I did some checks (just a few pictures here): I did not check the spindles as the car is having printed spindles and they were checked last year. I'm quite comfortable about the arms and shock tower definitions and the bumper as well... I also printed a chassis halve... This part is long, and very difficult to model due to the complexity and the lack of obvious reference point for measurements. plus the fact that among the 3 chassis I had in hands, none is deformation free... I expected some issues, and it was not disappointing, or it is, I'm not sure what to say Short conclusion : I expected some issue, and there is. There will be work to adjust the chassis halves, and to refine the side pods after that. And Ryo from TheOptimaHouse will have to wait I have all of this right before he can actually work his roll cage out... I buy kits to built and ru(i)n them
|
|
Please Log in to join the conversation. |
