|
Think a little and read and understand all the respons to your posts bro. If you have static front axles, 2 bearings per front wheeles. Like it's for your scorcher,ย you need 2 bearings per wheeles. Like on the original wheeles.......
The following user(s) Liked this: Alvin777
|
|
Please Log in to join the conversation. |
|
Hi, forgive me for the inquiries, still learning the ropes ๐๐ผโ๏ธ.
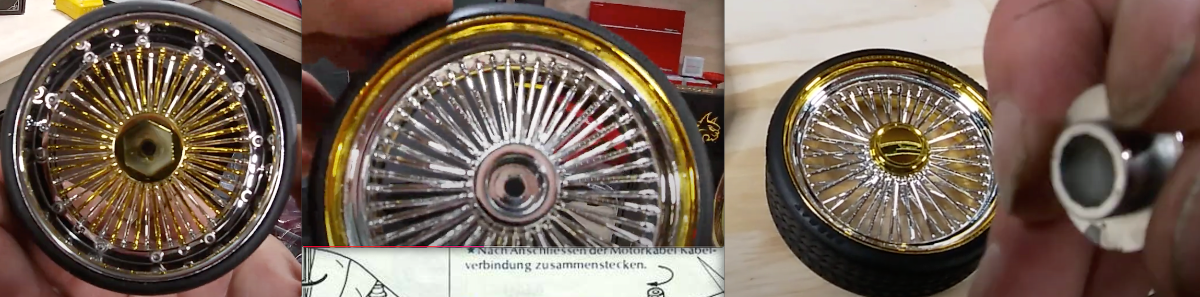
Could you double check the RedCat 26" Lowrider (wheel made for the Monte Carlo SixtFour), I looked at a Youtuber's review essentially, in the screenthot attached there seems to be no room for another 12mm hex bearing (that bearing in a 12mm hex nut) for the front (middle picture) of the wheel, no hexagonal outline for the front (the groove is a cylinder) as pronounced as the one for the back (left photo), where the hexagon groove is very pronounced. Also it's decorative lug cap is a male which seem to be friction fit, making it even have no room for a second 12mm hex bearing (which would be great for the budget I only need to buy 1 pair of bearings Thank you again for the all the help in advance, have a great/blessed day. (the video where the screenshots are from can be checked out on Youtube. The title is 'Lowrider Redcat 26ers in the House' by redwolf) Holiness

|
|
|
Please Log in to join the conversation.
Last edit: by Alvin777.
|
|
Hi Tamiybase friends, I'm still ordering missing parts (misplaced through years of storage, trading kits and a house transfer) including the front arms and front axles (among a lot of parts, the budget to give it a 2nd life, not really much to restore it to the original is surpassing a bit the price of brand new but base model, like a re-released Grasshopper or a Hornet w/out shipping :-D it's a cross and challenging but that's life).
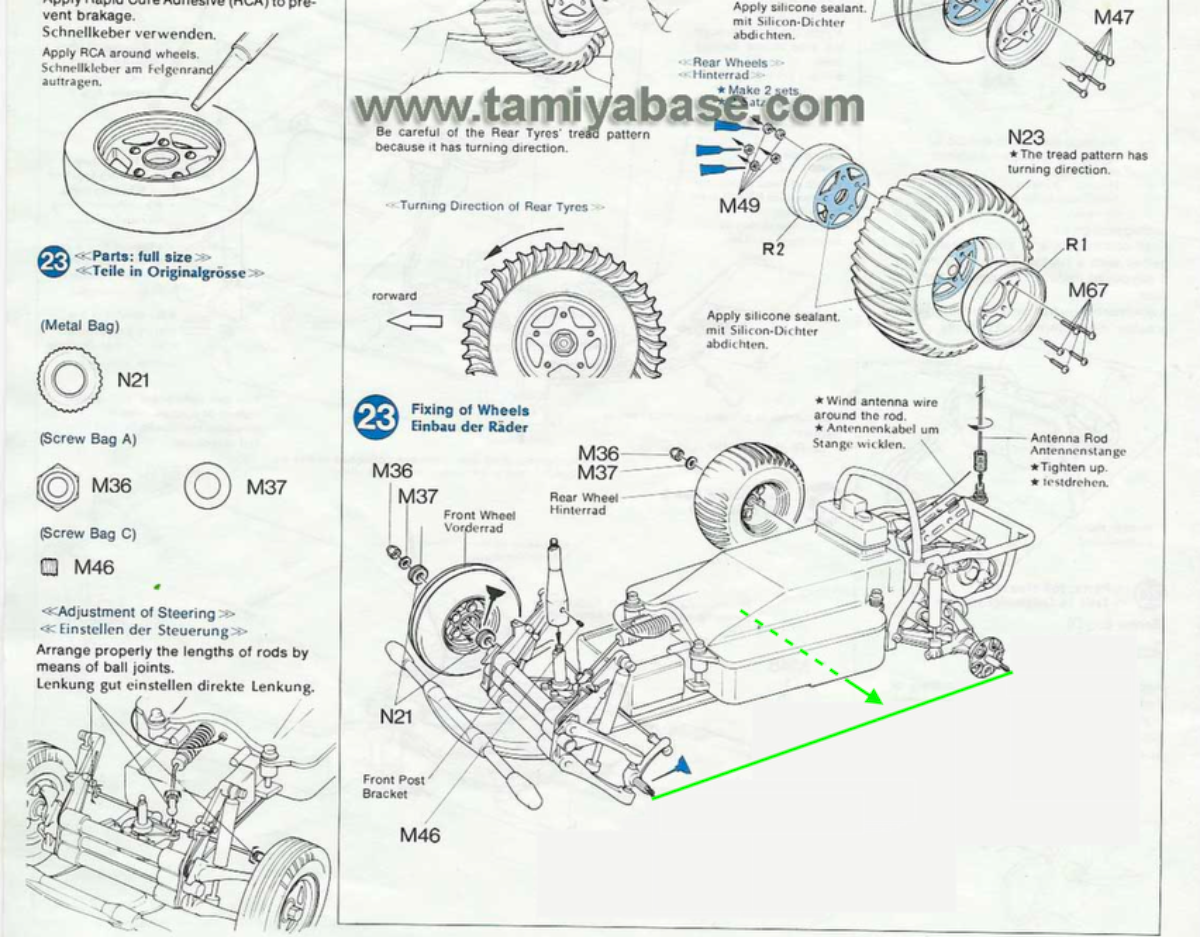
I wanted to ask (so when I buy any set of wheel w/ tires + adapters if needed, the clearances are fine) if the length of protrusion of the tips of the front and back axles from the middle of the unit are equal or the front has a shorter protrusion (illustrated in green in the attached picture). ย Thank you in advance for the patience and expertise. God bless RC modifiers. Holiness
|
|
|
Please Log in to join the conversation.
Last edit: by Alvin777.
|
|
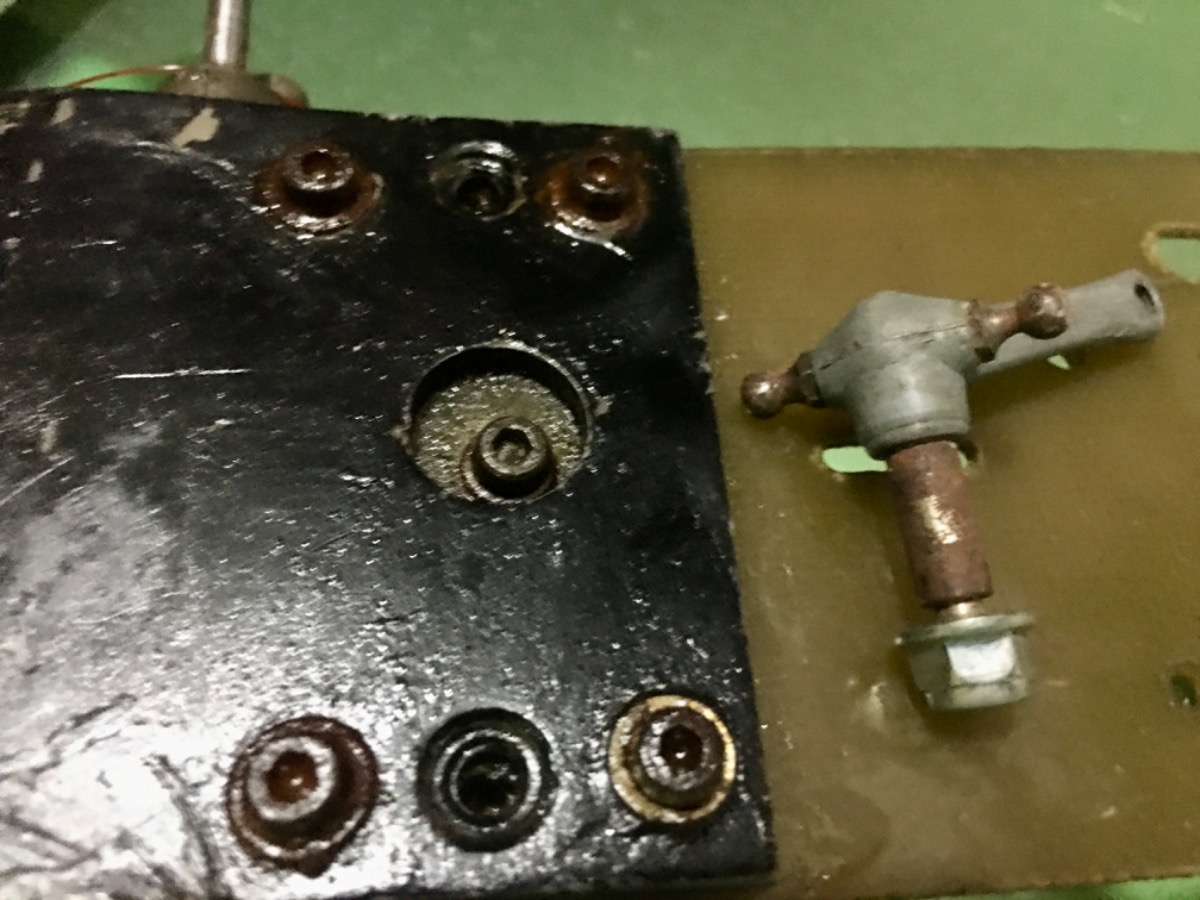
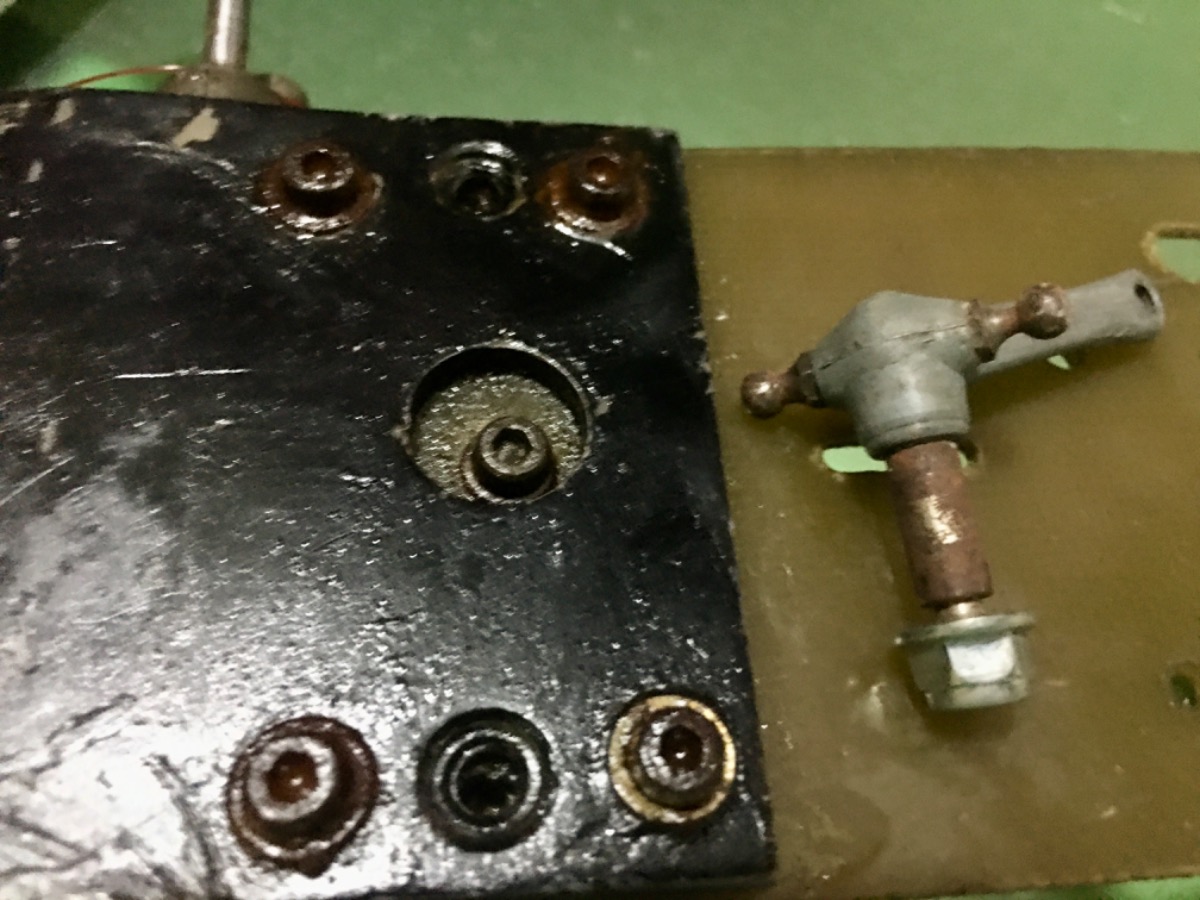
Hello RC friends, preparing things when I order the missing parts and when it arrives, what's next after penetrating oil (Ballistol brand an organic oil which Ballistol emailed is actually great as penetrating oil) doesn't budge the screws (left for a few days) coz' of rust? Hammer, tap the screws (what I think is fiberglass chassis might break)? Heat the screws (by how much heat in celsius, the plastic bumbler and what I think is a fiberglass chassis may melt); same situation with the pinions on the front axle (on the right of the attached picture).
By the way, if white vinegar removes green corrosion from copper and zinc (e.g. spring battery contacts of remote controls) when left for 15 to 1 hour (so it doesn't eat the zinc coating as well), I've used rust converters but is there a chemical that works as great for copper and zine rust but for iron rust that really cleans it as it were new (not convert the rust into something else like rust converters) without scratches?Thank you in advance.God bless RC guys. Holiness
|
|
|
Please Log in to join the conversation. |
|
Hello RC friends, preparing things when I order the missing parts (a cross, a challenge with some projects but a great relief when things are found and verified and is almost over
By the way, if white vinegar removes green corrosion from copper and zinc (e.g. spring battery contacts of remote controls) when left for 15 to 1 hour (so it doesn't eat the zinc coating as well), I've used rust converters but is there a chemical that works as great for copper and zine rust but for iron rust that really cleans it as it were new (not convert the rust into something else like rust converters) without scratches? Thank you in advance for your time and expertise. God bless RC enthusiasts. Holiness
|
|
|
Please Log in to join the conversation.
Last edit: by Alvin777.
|
|
Please stop askiing questions and do some research yourself.
No one here owns those Redcat wheels. And try to limit your number of threads, this is getting silly. How about start a resto thread in the right place of your SS (vintage Tamiya) and keeo your questions there? |
|
|
Please Log in to join the conversation.
Last edit: by caprinut.
|
|
My apologies I'm new to this. ๐๐ผ I'm truly also doing my research before posting in light that some manufacturers are also culpable who don't post the technical details of their products (200+ tabs and browser window type of intense research starting from almost scratch, still even learning the technical names and terminologies) its just that things are time-sensitive at the moment and multiple things are in need of attention at same time for different topic from rust problems to multiple part but I guess that could be in one thread in one of the restoration section. But thanks for the correction. Again my apologies Tamiyabase friends. ๐๐ผ
(in the picture for example we could see how intense I research first before I post, there are 11 windows, each windows has 10 to 100 tabs each) Holiness
|
|
|
Please Log in to join the conversation.
Last edit: by larbut.
|
|
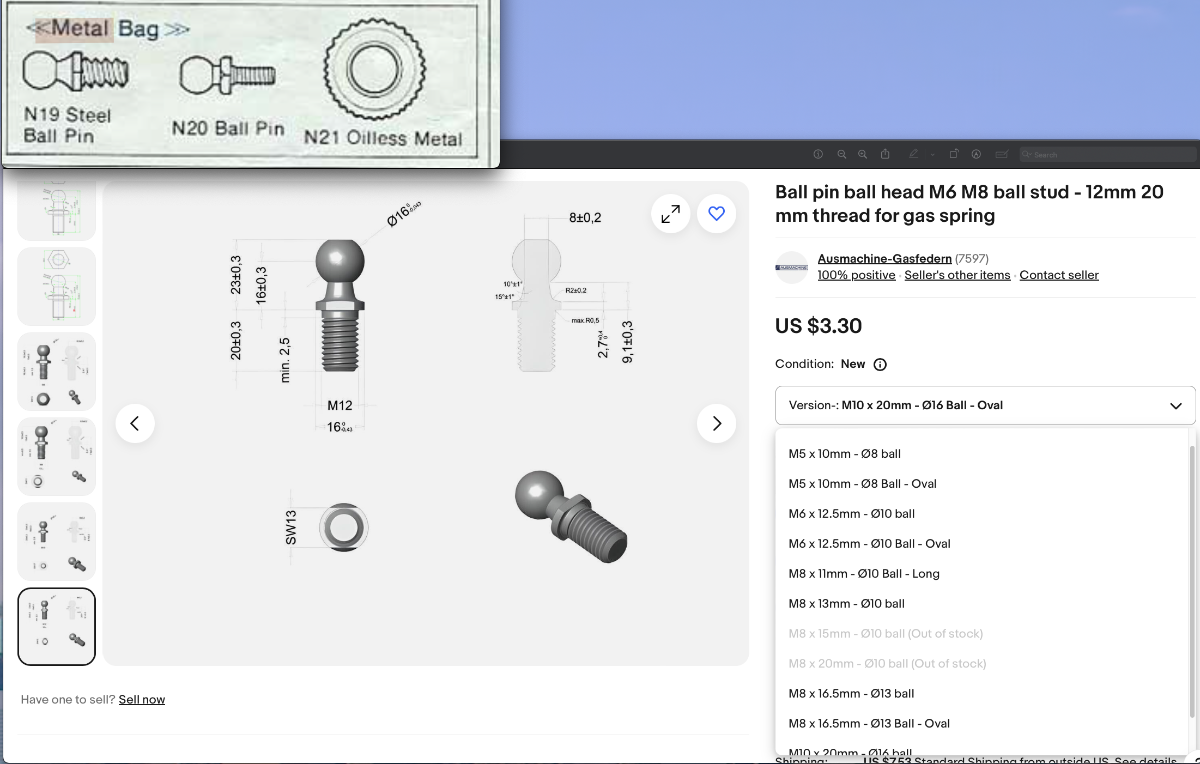
Hi, thanks again for the correction and for consolidating it here, first time I've done this, restoration is a challenge but if it's ok to ask I can't find an N20 ball stud/ball pin nor it's dimensions. What are the standard names & dimensions (L x W and thread pitch) of the N20 (brass) & N19 (stainless steel, in case I can't unscrew my N19 joints) in the picture? Right photo is '79' Scorcher manual.
Btw does the N20 (more important to buy) need to be brass? Have a great day. Holiness
|
|
|
Please Log in to join the conversation.
Last edit: by Alvin777.
|