Keyword
  • Page:
  • 1
  • 2

TOPIC:

My Scale Garage - From start to finish and beyond.... 2 years 3 weeks ago #79191

  • toyolien
  • toyolien's Avatar Topic Author
  • Offline
  • Being nuts is NEAT!
  • Being nuts is NEAT!
  • Posts: 34
  • Likes received: 113
I started this project a year or so ago and thought I'd add my progress on here.

I've not been great with keeping up with what going on on TamiyaBase, but I will do from now on. I've got a few projects planned over the next few months, and wanted to tidy up my scale garage ready to take pics. Apologies that there is a lot of pics, I hope you don't mind. 

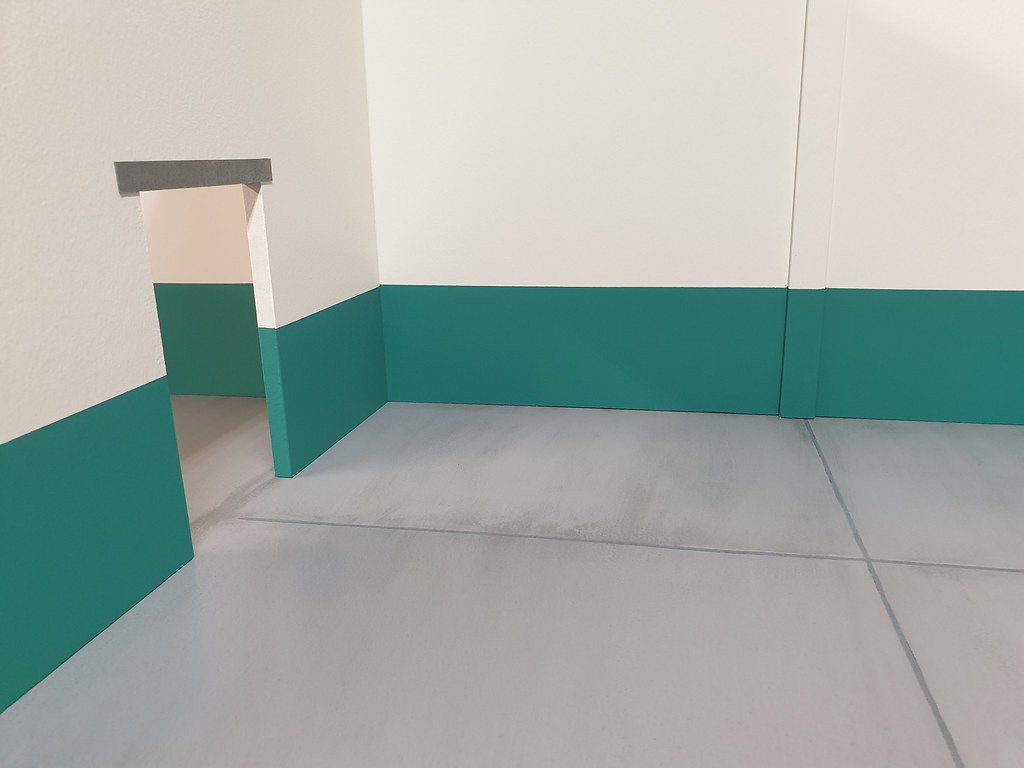
I'll give a little of the back story. I sold my scale garage last year because at the time, our house was sold, we'd put an offer in on another one, and there wasn't room to put it. I thought that was that, but the new house fell through, and so did our sale, so we just decided to stay put and either move in a few years or just stay here permanently.  I'd boxed up most of my RC stuff in storage and have gradually been reintroducing it. I've got a few M-chassis builds planned this year, and I have liked looking back at my previous build pics that were taken in the scale garage. So, here comes another one.  My wife now has part of my garage with a desk to work from home so room is a little tighter than before. The garage will therefore be a little smaller than before:  I started by drawing up the panel sizes.   My local hardware store offers a free cutting service, so I got them to cut the pieces. A quick mock up for size.  The cardboard will eventually be an opening for a 'store room' with some shelving in. No real function other than to make the pics a little more interesting.  Onto the base. As before. I routed out some lines to replicate concrete expansion joints using a straight edge and my dremel.  Then filled them in with some dark wood filler. Only reason for this is so that when the grey top coat goes on the joint lines will look a different colour.  Masked the joint lines, and primered the base.  And, a couple of coats of 'concrete grey' to finish off.

The following user(s) Liked this: BlueMallard

Please Log in to join the conversation.

Last edit: by toyolien.

My Scale Garage - From start to finish and beyond.... 2 years 3 weeks ago #79192

  • toyolien
  • toyolien's Avatar Topic Author
  • Offline
  • Being nuts is NEAT!
  • Being nuts is NEAT!
  • Posts: 34
  • Likes received: 113
A little weathering using the 'dry brushing' technique.


The rear and side panels are painted using some old magnolia emulsion paint I had spare. Then a coat of green for the lower part. Masking tape coming off.


On to the first part of the weathering. This is just a simple wash made from 5% brown acryllic paint mixed with 95% water.


Then the same but with black paint.


Also used black on the white parts.


Once dried, I used some various sanding blocks and sticks to start adding non symmetric detail. The wash is good to start with, but once dry it can look very 'uniform'.


And here's it is after the first round of weathering using various paint colours and some 'dry brushing'.


Next job was to make a 'concrete' looking lintel to go over the store room door cut out. I started with some thin styrene, and just battered it randomly with a metal scribe and a screwdriver.


More black wash.


Glued in place. Before and after weathering.


And a before and after pic of the walls.

The following user(s) Liked this: stingray-63, Al, GToddC5

Please Log in to join the conversation.

My Scale Garage - From start to finish and beyond.... 2 years 3 weeks ago #79193

  • toyolien
  • toyolien's Avatar Topic Author
  • Offline
  • Being nuts is NEAT!
  • Being nuts is NEAT!
  • Posts: 34
  • Likes received: 113
Next job, skirting board. Luckily I had enough left from the previous garage. This is just 1/12th scale dolls house skirting, that's cut to length, stained and then glued in place.


I like the last door I made and wanted something similar, but this one needs to look older. I started with a piece of 3mm hardboard the correct size, and then glue on individual strips of wood. Each strip has been scored, cut and had the edges roughly sanded using a sanding wheel in my dremel to make them look old and used.


Using a 3mm thick metal rule to replicate the gap between the two doors.


And, the outer frame is then glued on top:


Coated in some wood stain. Once this has dried, I'll start dry brushing some more weathering details in.


And a little 'extra scale detail'.


Just waiting on the middle pair of hinges to arrive. That's where I'm at for now. More coming soon.

 
The following user(s) Liked this: stingray-63, Al, Ducksnuts, GToddC5

Please Log in to join the conversation.

My Scale Garage - From start to finish and beyond.... 2 years 3 weeks ago #79194

  • toyolien
  • toyolien's Avatar Topic Author
  • Offline
  • Being nuts is NEAT!
  • Being nuts is NEAT!
  • Posts: 34
  • Likes received: 113
A little more done today. 

Firstly a nice vintage looking work bench using some strips of beech wood.


Again with this, I used the dremel to 'roughen' up the edges so that they looked well used.


Then added some more random damage using a few tools etc.


A couple of uneven coats of dark stain.


And here we are. A 60 year old workshop bench.


This is a pen pot that I've had for a while. It's the perfect size for this garage.


It looked to 'new', so I bent and scraped it up a little and added some weathering and rust.


Here it is next to my metal fridge magnet, that I also weathered up a little.


That'll do for tonight.
The following user(s) Liked this: GToddC5

Please Log in to join the conversation.

My Scale Garage - From start to finish and beyond.... 2 years 3 weeks ago #79195

  • toyolien
  • toyolien's Avatar Topic Author
  • Offline
  • Being nuts is NEAT!
  • Being nuts is NEAT!
  • Posts: 34
  • Likes received: 113
Not a great deal of progress over the last few days, but I've been doing a few odd jobs trying to get some of the fixtures and fittings finished up.

I'll just post up some quick pics and short descriptions as there's a fair few.

First up a strip light for the little store room. I just used some scraps of styrene and an LED strip light. Nothing special.


Next. A small metal working bench.


Please Log in to join the conversation.

My Scale Garage - From start to finish and beyond.... 2 years 3 weeks ago #79196

  • toyolien
  • toyolien's Avatar Topic Author
  • Offline
  • Being nuts is NEAT!
  • Being nuts is NEAT!
  • Posts: 34
  • Likes received: 113
This one is something I spotted whilst googling some tool box designs. It's a 1/12th scale cantilever style tool box that you build up out of some very thin brass sheet. I was a little concerned that it was a little beyond my abilities to make it look real, but I just took my time. I did have to use my magnifying light though...

Here's how it was delivered. It came with some great instructions.


After cutting and folding the pieces, it started coming together.


And here it is completed. I'm quite happy. Perhaps I should have painted the pieces before assembly, but as I'm going to weather it, I don't think it'll matter that much.


A couple of coats of etch primer.


Two top coats, and some weathering.


Another quick one. I've had this a while, but it needed finishing.


And lastly for now. I mixed up some acrylic paint to dry brush some mark lines where the doors would rub the floor when opened and closed.


Marking out where the lines would appear.


Not a dramatic effect, but you get the idea.


Thanks for looking... again.

 
The following user(s) Liked this: stingray-63, Ducksnuts

Please Log in to join the conversation.

My Scale Garage - From start to finish and beyond.... 2 years 3 weeks ago #79197

  • toyolien
  • toyolien's Avatar Topic Author
  • Offline
  • Being nuts is NEAT!
  • Being nuts is NEAT!
  • Posts: 34
  • Likes received: 113
I managed to get most of the day working on my scale garage today. The plan was to get it to a stage where I can start using it for build pics. There will obviously be other stuff to do to it, but hopefully, after today, it'll be ready for pics.

A small project I planned to do a while ago. I have a set of M-chassis springs that I thought might look quite good in a little crate. 


And, of course, I needed to make them look used.


Next, some shelving for the 'store room' part.


And some boxes to fill up the shelves.


Please Log in to join the conversation.

My Scale Garage - From start to finish and beyond.... 2 years 3 weeks ago #79198

  • toyolien
  • toyolien's Avatar Topic Author
  • Offline
  • Being nuts is NEAT!
  • Being nuts is NEAT!
  • Posts: 34
  • Likes received: 113
Next up, some wall art. I have a few Tamiya decals that I thought might look good on the walls. But, rather than just stick them on, I decided to put them on a wooded background and then once again, make them look like they've been there for a long time.


Some simple shelving to go above the work benches. Nothing special, just functional.


And, the last project on the list for today, a vintage looking tire stand for some spare Frog tires I have.


I overlooked that the tires stick out so the rack couldn't fit against the wall, so I added these little 'stoppers'.


Perfect. Oh, and I forgot to take pics of the Blockhead sign, but it's the same as the Tamiya one above.


Please Log in to join the conversation.

My Scale Garage - From start to finish and beyond.... 2 years 3 weeks ago #79199

  • toyolien
  • toyolien's Avatar Topic Author
  • Offline
  • Being nuts is NEAT!
  • Being nuts is NEAT!
  • Posts: 34
  • Likes received: 113
Finally, a few pics of how the garage looks now.


I've been working on and off on a few things for the scale garage. Thought it was about time I updated this thread a little.

First up. Some very simple cardboard boxes for the shelving unit in the 'backroom'.


A small wooden pallet for the pallet truck. This is just to photograph small parts used on my builds.

Please Log in to join the conversation.

My Scale Garage - From start to finish and beyond.... 2 years 3 weeks ago #79200

  • toyolien
  • toyolien's Avatar Topic Author
  • Offline
  • Being nuts is NEAT!
  • Being nuts is NEAT!
  • Posts: 34
  • Likes received: 113
Next. I had this idea for a small wooden box that housed a 9v battery that could be used to light up a few different items I have. To start with, I tried this miniature pumpkin I've had for a while. The idea seems to work ok. I used small strips of wood that I then scored, scratched and hit to make it look old and weathered.


Another idea I'd had for a while was a Tamiya driver figure head that has the face dremelled out to look like an empty helmet. This is really just for display.


Finally some door furniture.


img]live.staticflic...78bf_b.jpg[/img]
The following user(s) Liked this: caprinut, Al, blakbird, Ducksnuts, GToddC5

Please Log in to join the conversation.

  • Page:
  • 1
  • 2
Moderators: caprinut, stingray-63, AndyAus
Time to create page: 0.389 seconds