Keyword

TOPIC:

Blakbird's FF-03 Full Family Build 1 year 8 months ago #80086

  • blakbird
  • blakbird's Avatar Topic Author
  • Offline
  • Impressive Numbers
  • Impressive Numbers
  • Posts: 1426
  • Likes received: 1282
In this topic I am going to build and compare 6 different versions of the FF-03 chassis, and talk about all the other versions of the FF chassis series.  Get ready for a long one....

The vast majority of Tamiya touring cars over the years have been All Wheel Drive.  The TA, TB, TL, TRF, and TT series chassis have varied in their use of shaft or belt drive and in their positioning of the motor, but all have driven all four wheels.  Formula 1 and Group C chassis have been Rear Wheel Drive, the standard for real racing cars.  No sensible person would race using Front Wheel Drive, but that didn't stop Tamiya from producing a line of strange looking FWD chassis titled "FF" for a period of a little over 10 years.  It started with the FF-01 in 1993 and ended with the FF-04 EVO in 2014.  The section below recounts a brief history of this chassis series and presents the differences and similarities in their design over the years.

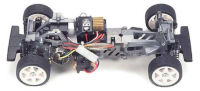
FF-01 (58121):  This model was first available in July of 1993.  It was never available as a standalone chassis but first released with a Idemitsu Motion Mugen Honda Civic body.  There were a total of sixteen bodies available with this chassis between 1993 and 1998.  Features included laterally front-mounted motor, front wheel drive, 258mm wheelbase, plastic bathtub chassis from the TA-02, ball differential, plastic CVA dampers, plastic bearings, dual bellcrank steering, dog bone style axles, double wishbone suspension, fixed upper links, and 0.6 mod gears.  The kit included a standard silver can motor.

FF-02 (58224):  This short lived model was first available in October of 1998 and was completely different than the FF-01.  It was never available as a standalone chassis but first released with a Peugot 306 body.  There were a total of three bodies available with this chassis between 1998 and 1999.  Features included laterally mid-mounted motor, front wheel drive, 257mm wheelbase, modular monocoque chassis, gear differential, plastic friction dampers, plastic bearings, dual bellcrank steering, dog bone style axles, double wishbone suspension, fixed upper links, and 0.6 mod gears.  The chassis was literally just a stretched M-03.  The kit included a standard silver can motor.

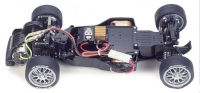
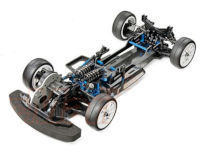
FF-03 (58467):  This model was first available in July of 2010.  It was never available as a standalone chassis but first released with a Castrol Honda Civic body.  There were a total of six bodies available with this chassis between 2010 and 2012.  Features included laterally front-mounted motor, front wheel drive, plastic bathtub chassis, ball differential, plastic CVA dampers, lateral inboard front suspension, stamped aluminum motor mount, full ball bearings, dual bellcrank steering, dog bone style axles, double wishbone suspension, turnbuckle upper links, and 0.4 mod gears.  The chassis was configurable to short (233mm) medium (245mm) or long (257mm) wheelbase.  The kit included a standard silver can motor.

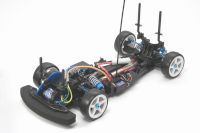
FF-03 PRO (58463):  This variant was first available in June of 2010.  It came out at the same time as the regular FF-03 and was a slightly more deluxe version for sale as a chassis kit without a body.  Changes included a blue machined instead of stamped aluminum motor plate, blue aluminum instead of steel tie rods, high torque servo saver with aluminum horn, blue aluminum ball connectors, and aluminum TRF instead of plastic CVA dampers.  By far the biggest upgrade was the dampers which cost nearly as much as a whole standard FF-03 kit if purchased separately.  The kit included 5-spoke wheels but no tires, body, or motor.

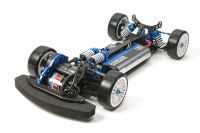
  FF-03R (84288):  This variant was first available in May of 2012.  It started with the FF-03 PRO and added a sealed gear instead of ball differential, aluminum suspension mounts, CVD instead of dog bone axles, carbon reinforced plastics, clamping aluminum hexes, and a carbon battery plate which doubled as an upper deck.  Interestingly, the aluminum servo horn from the PRO went away and reverted to plastic.  As a pure chassis kit, it did not include tires, wheels, motor, or body.

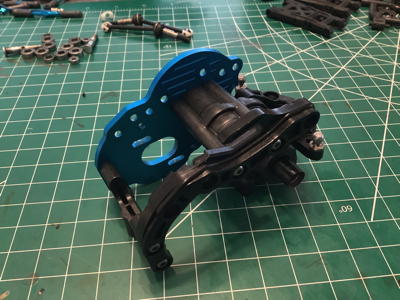
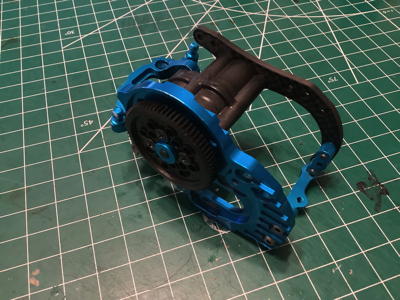
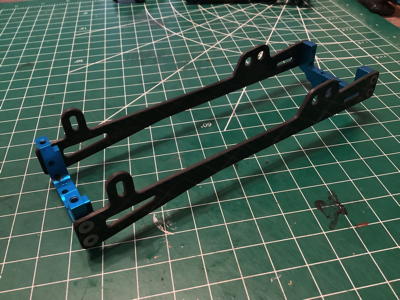
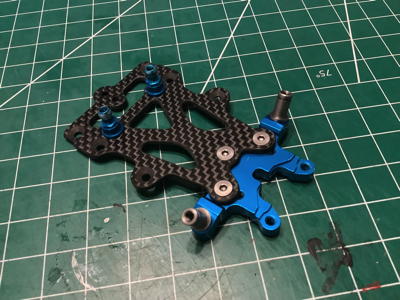
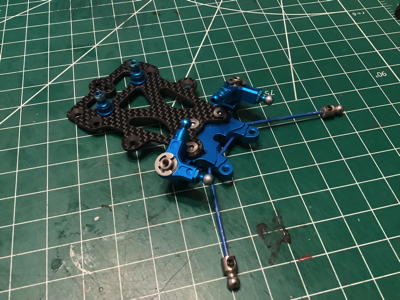
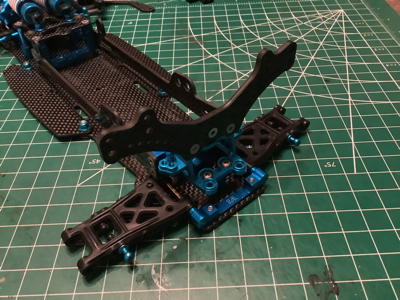
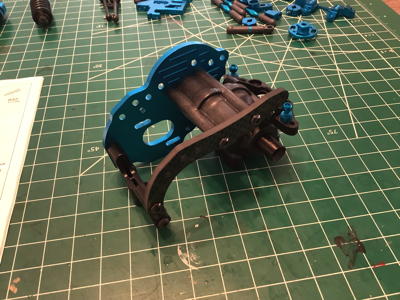
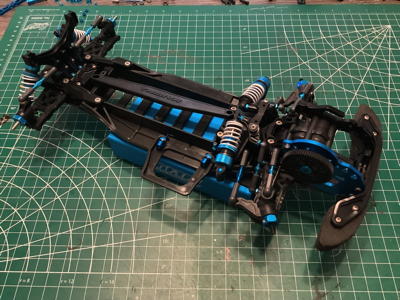
  FF-03 Upgrade (84314):  This upgrade kit was first available in January of 2013.  This was not a complete chassis kit; it assumed you already had a standard FF-03, PRO, or R and provided the necessary parts to convert to a full carbon chassis.  The kit added a carbon chassis with twin vertical plates and stiffeners, aluminum center bulkheads, carbon steering stiffener, aluminum steering cranks and bridge, aluminum damper bridge, and converts from lateral to longitudinal inboard front suspension.  The converted chassis could only be configured to the medium or long wheelbase options; there was no way to configure the short wheelbase.  Whether or not this chassis included a gear differential, TRF damper, or other upgrades depended on the type of model used as the basis of conversion.  If converted from an FF-03 R, this chassis was in many the equal of, or even superior to the FF-03 EVO which came out later the same year.  The photo shows the upgrade kit installed on a basic FF-03.

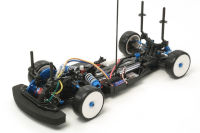
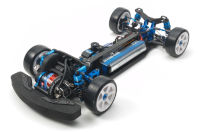
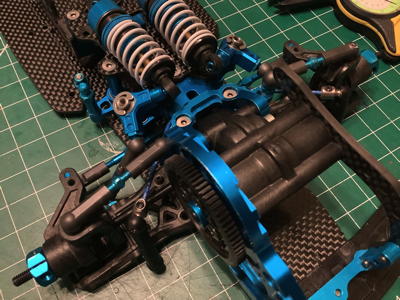
FF-03 EVO (84354):  This variant was first available in August of 2013.  It started with the FF-03R and replaced the standard plastic bathtub chassis with a double deck carbon chassis and converted from lateral to longitudinal inboard front suspension.  Additional changes included a metal drive gear, carbon motor stay, aluminum steering cranks and bridge, carbon shock towers, double cardan axles, and aluminum rear bulkheads.  The kit also included special bearings with fluorine coated seals and used hex screws instead of JIS hardware.  The aluminum suspension mounts of the R reverted to plastic for some reason.  Unlike the other versions of the FF-03, this version did not have an adjustable wheelbase and could only be built in the long wheelbase configuration.  There was no battery plate on the EVO; the battery was intended to be installed with glass tape.  As a pure chassis kit, it did not include tires, wheels, motor, or body.

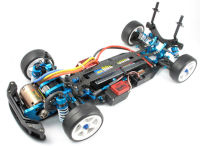
FF-04 EVO (84394):  This model was first available in November of 2014.  This new model came out barely a year after the FF-03 EVO.  It used carbon upper and lower chassis decks like the FF-03 EVO, but replaced the gearbox with the one from the XV-01 and used TRF 418 suspension arms.  Apart from the sealed gear differential, axles, and knuckles, pretty much every other part was changed.  The longitudinal inboard front suspension was replaced with standard vertically mounted shocks.  The chassis was designed for a low profile steering servo but included provisions for standard servo as well.  As a pure chassis kit, it did not include tires, wheels, motor, or body.

FF11:  This model was first available in June of 2011.  The FF11 was not a Tamiya model, it was an aftermarket carbon conversion of the FF-03 by a defunct company called Huge RC.  From the manufacturer:
Over 6 months in development by former World Champion Surikarn Chaidajsuriya, Huge RC have released the FF11 FF-03 conversion. The prototype was used to win this year’s FWD class at the TITC in Thailand, with the design aimed at making the car more rigid, tunable and reliable on the track. The kit features a narrow 2.5mm carbon fibre chassis allowing it to rip through corners as well as a 2mm carbon fibre top deck held in place by 8 screws which can be removed to adjust flex. A new battery mounting system, utilizing an o-ring and aluminium mounts keeps it in place while tape slots allow it to be secured further. Other features include 3mm carbon fibre front and rear shock towers, one piece aluminium front motor mount and blue anodised aluminium lower bulkheads, which are symmetrical in design allowing the bulkhead to be interchangeable front and rear.

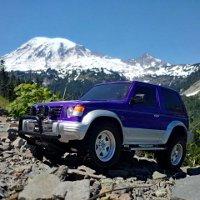
As someone who is interested in a broad range of chassis styles, I knew I wanted at least one FF chassis in my collection.  The problem is that the vast majority of the hatch back bodies available were not appealing to me.  Looking through the list of possible chassis options, I settled on the FF-03 EVO, a deluxe chassis variant with no body, as my target.  Finding one to buy proved to be difficult.  The FF chassis were never particularly popular (probably why Tamiya stopped making them), and the limited edition EVO models are even more rare.  For a long time I couldn't find one available at any price.  Finally I found a huge lot of FF-03 chassis and parts on eBay.  This particular lot came with 6 different versions of the FF-03.  There were two copies of the EVO (one stock and one upgraded), two copies of the PRO (both heavily upgraded, one with blue aluminum and one with clear aluminum), one copy of the R upgraded with the carbon fiber upgrade kit, and one copy of the aftermarket FF11.  There were also literally hundreds of spare parts.  Because I'm me, I went ahead and purchased 6 cars to get 1 with the intention of selling the other 5 and recovering as much of my investment as I could.  Before I sold them though, I decided to take the unique opportunity to disassemble and then build every version of the FF-03.  You'll find my documentation of each of these build on the posts that follow.

For the FF-03 EVO that was my original goal and I intend to keep, I installed a relatively simple brushed power system which is plenty fast for me.  I've been surprised at how well this front wheel drive chassis handles.  With all the weight over the front wheels, I'd expect a lot of push and understeer but it actually drives incredibly well.

 
Attachments:
The following user(s) Liked this: stingray-63, Deekay777

Please Log in to join the conversation.

Blakbird's FF-03 Full Family Build 1 year 8 months ago #80087

  • blakbird
  • blakbird's Avatar Topic Author
  • Offline
  • Impressive Numbers
  • Impressive Numbers
  • Posts: 1426
  • Likes received: 1282
While documenting this first part of the build project, I am going to compare the basic FF-03 chassis, FF-03 PRO, and the more upgraded FF-03 R.  All share a great deal in common.  I probably had the parts available to build each separately in sequence, but it made more sense just to compare them as I went along.

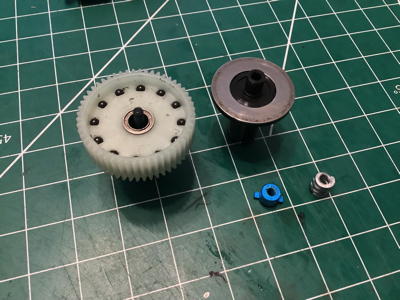
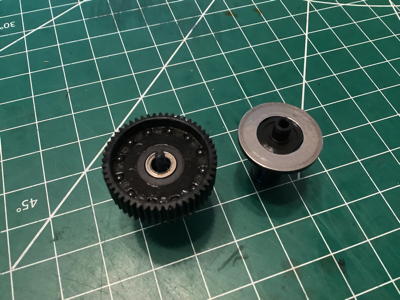
The basic FF-03 and PRO both came with a ball differential using the white gear set 51416 from the TRF 201.  The black gear set is a glass reinforced upgrade (54262) that came with my upgraded model purchase.
   

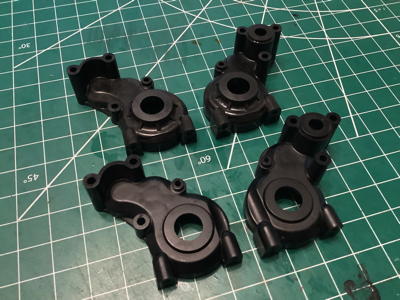
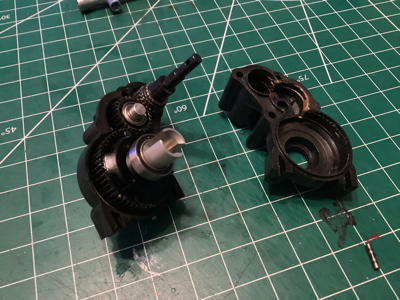
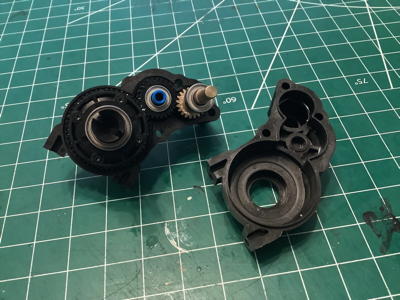
The FF-03 R uses a sealed gear differential from the TA-06 instead of the ball differential discussed above.  The width of the gear differential is greater than that of the ball differential so a wider gearbox housing is required.  The original housing (9005979) is shown below the wider R housing (9008152), each of which comprise a different A parts tree.  Look in particular at the large opening for the drive cups and see how the upper housings have a deeper boss.  Almost all of the plastics on the R are carbon reinforced including the gearbox housing.
   

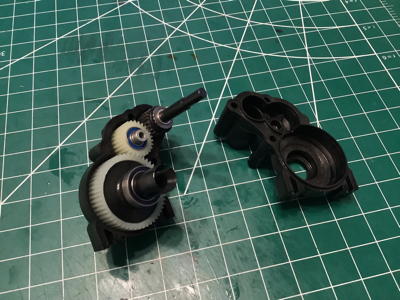
Here an original ball differential is being installed into the 3 gear transmission housing.  The input counter gear is metal.  All versions of the FF-03 use full ball bearings.
   

The standard FF-03 uses a simple stamped metal motor mount while the PRO and the R use a more complex machined aluminum mount with heat sink slots milled into it.  Since I don't have a standard FF-03 I can't take a photo for comparison (this is the blue anodized machined mount).  The motor sits ahead of the front axle on the FF-03. 
Attachments:

Please Log in to join the conversation.

Last edit: by blakbird.

Blakbird's FF-03 Full Family Build 1 year 8 months ago #80088

  • blakbird
  • blakbird's Avatar Topic Author
  • Offline
  • Impressive Numbers
  • Impressive Numbers
  • Posts: 1426
  • Likes received: 1282
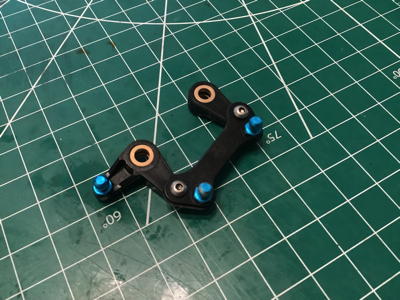
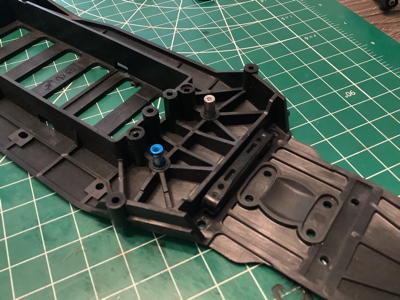
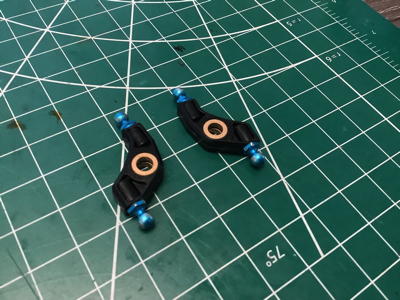
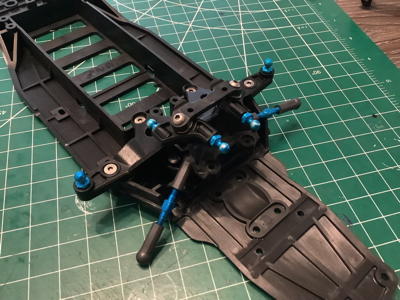
The plastic dual bellcrank steering is the same on all 3 chassis variants and all use metal bushings rather than bearings on the pivots.  The blue aluminum pivot balls are from the R.  The stainless hex hardware shown is an upgrade that came with my model purchase.  The kits came with JIS screws.
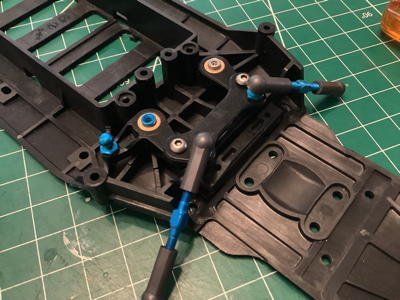
Here the steering is installed into the chassis.  The plastic bathtub chassis is common to all 3 variants.  Although the R uses a lot of carbon reinforced plastics, the deck is not among them probably because it would be too brittle.  The standard FF-03 used steel turnbuckles.  The blue aluminum versions shown came with the PRO and R.
   

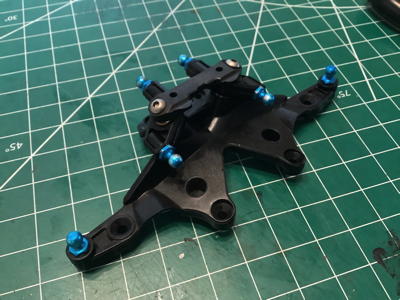
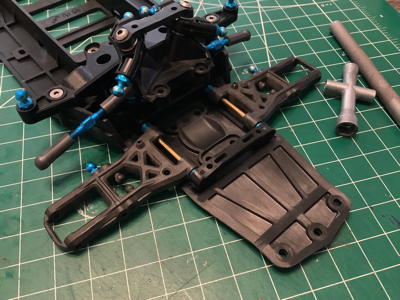
Now to build the inboard front suspension system.  The bridge parts (K parts tree) are carbon reinforced on the R.  The blue pivot balls are also from the R.   The layout is the same on all 3 variants.
   

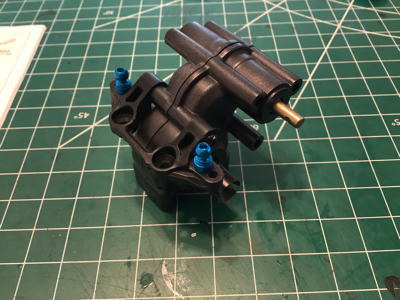
Now the suspension bridge can be attached to the chassis.  This step covers and retains the steering posts as well.  The lower suspension arms (D parts tree) are carbon reinforced on the R.  The standard FF-03 and the PRO use plastic suspension blocks while the R uses machined aluminum versions.  The plastic versions are shown here.  This system of mix-and-match suspension blocks to control toe angle originally came from the TRF 415.  The reversible suspension arms originally came from the TRF 417.
   
Attachments:

Please Log in to join the conversation.

Blakbird's FF-03 Full Family Build 1 year 8 months ago #80089

  • blakbird
  • blakbird's Avatar Topic Author
  • Offline
  • Impressive Numbers
  • Impressive Numbers
  • Posts: 1426
  • Likes received: 1282
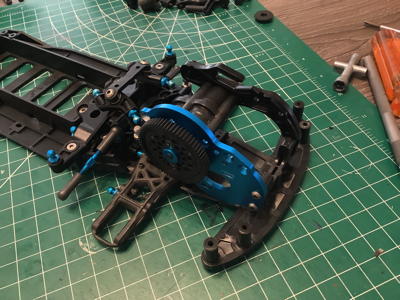
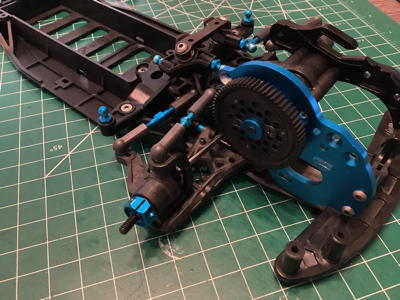
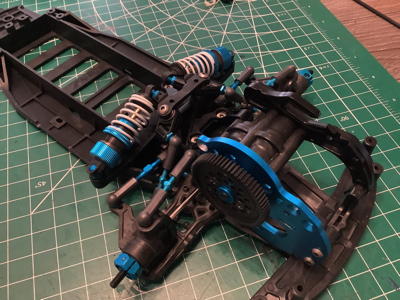
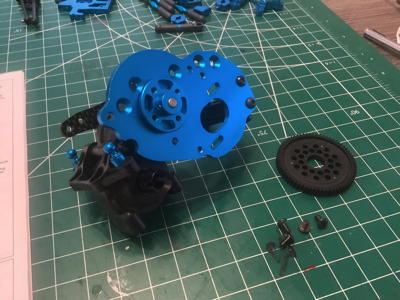
Now the front bumper support and the spur gear have been installed.  All 3 variants use the same 68T spur gear.  The blue aluminum spur gear mount shown is only used on the R.  The carbon reinforced C-hubs and knuckles (C and F parts trees) are also unique to the R.  The R uses the clamping aluminum hexes shown while the standard FF-03 and the PRO use plastic parts.  The knuckles and uprights originally came from the TRF 416.  The standard FF-03 and PRO use dog bone axles while the R uses CVD type axles from the TRF 417.
   

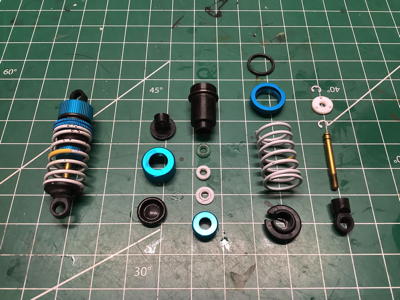
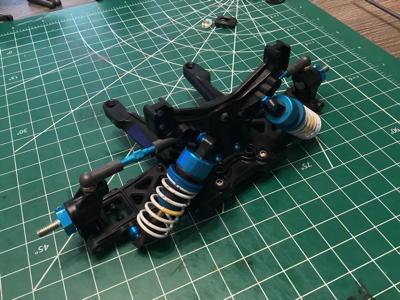
The standard FF-03 uses plastic CVA shocks, but both the PRO and the R use aluminum TRF shocks as shown.  I never get tired of building TRF shocks.
   

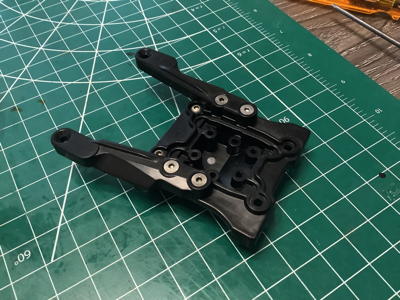
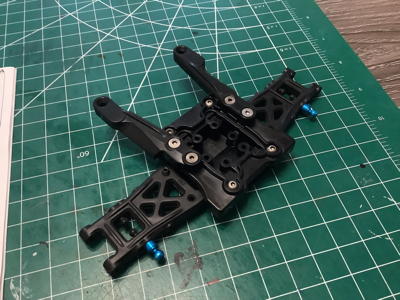
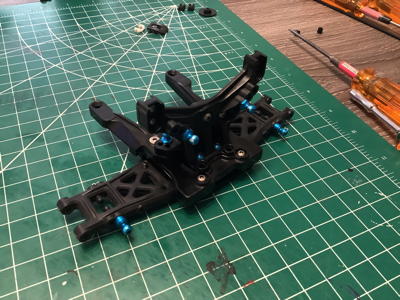
Now we can start on the rear suspension which looks very odd with no gearbox.  The rear suspension mount can be built 3 different ways to support different wheelbases (233mm, 245mm, 257mm). 
   

The shock tower, bulkhead, and supports (M parts tree) and rear uprights (E parts tree) are carbon reinforced on the R.  The front and rear shocks use different springs (yellow band medium rate on rear, blue band hard rate on front).  The rear suspension is built up as a complete module as shown.
   
Attachments:

Please Log in to join the conversation.

Blakbird's FF-03 Full Family Build 1 year 8 months ago #80090

  • blakbird
  • blakbird's Avatar Topic Author
  • Offline
  • Impressive Numbers
  • Impressive Numbers
  • Posts: 1426
  • Likes received: 1282
The finishing touches are the servo mount and battery stay.  The battery stay doubles as an upper deck and stiffens the chassis.  It is plastic (as shown) on the standard FF-03 and PRO, but carbon on the R.
  
Attachments:

Please Log in to join the conversation.

Blakbird's FF-03 Full Family Build 1 year 8 months ago #80091

  • blakbird
  • blakbird's Avatar Topic Author
  • Offline
  • Impressive Numbers
  • Impressive Numbers
  • Posts: 1426
  • Likes received: 1282
Now let's convert a standard FF-03 chassis using the FF-03 upgrade set.

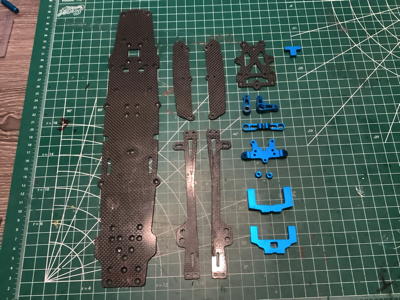
Here are all the parts the come with the FF-03 upgrade set knolled out on my work surface.  Everything is carbon or aluminum here.
As I convert my standard FF-03 chassis to the upgraded version, I'm also going to make a few other improvements.  Here I am replacing the standard ball differential with a sealed gear differential and using aluminum drive cups.  I'm also installing a carbon motor stay, aluminum bumper mount, aluminum motor heat sink plate, and aluminum front upper arm mount.  None of these parts came with the upgrade set.
   

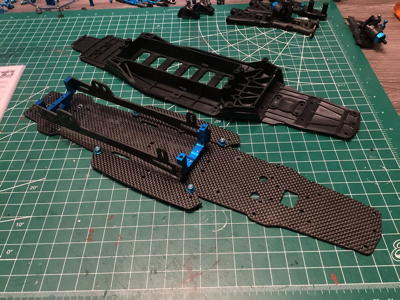
The upgrade set uses twin vertical plates as battery supports which also stiffen the chassis.  The battery sits right along the center line just like it does with the plastic chassis (shown for comparison).  I had actually installed the assembly in the wrong holes on the chassis in this picture.  The whole battery area should be shifted forward.  Even so, the battery is further back on the upgraded chassis than on the standard chassis.  The carbon "side pods" are platforms for installing the electronics.
   

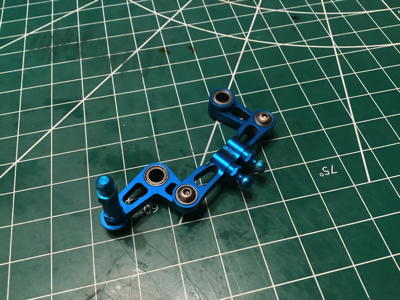
Now I can prepare the aluminum suspension bridge and carbon top plate.  These parts are shown on the left and came with the upgrade set.  Apart from the change to a carbon chassis, the primary difference between the upgrade set and the standard FF-03 is the conversion of the inboard front suspension from lateral to longitudinal.  This narrow bridge replaces the much wider one from the original.  The aluminum cranks shown on the right are aftermarket upgrades, as is the sway bar.
   
Attachments:

Please Log in to join the conversation.

Blakbird's FF-03 Full Family Build 1 year 8 months ago #80092

  • blakbird
  • blakbird's Avatar Topic Author
  • Offline
  • Impressive Numbers
  • Impressive Numbers
  • Posts: 1426
  • Likes received: 1282
The aluminum steering parts came with the upgrade set and look really cool.  The turnbuckles are reused from the standard chassis.  There is a lot of chassis plate in front of the steering because there needs to be room for the motor ahead of the front suspension.
   

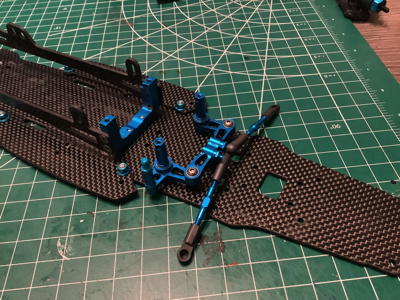
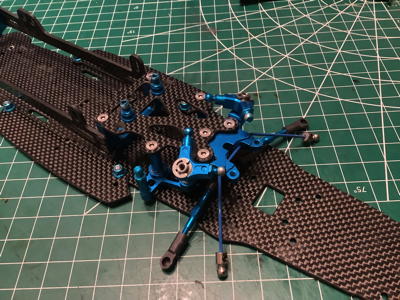
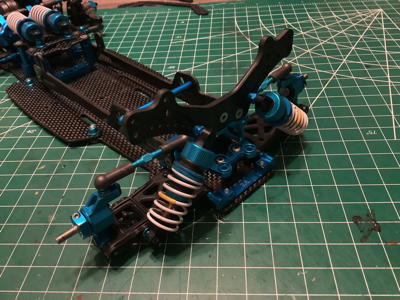
Now the steering can be encapsulated by the suspension bridge and top plate.  After that, the front gearbox and motor mount assembly can be installed.  The shocks have been reused from the FF-03R as has the entire front suspension assembly.
   

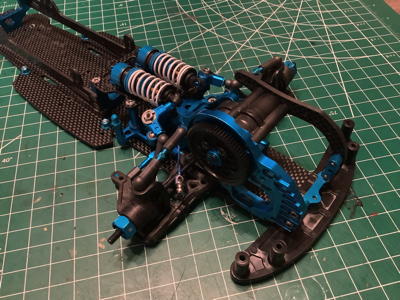
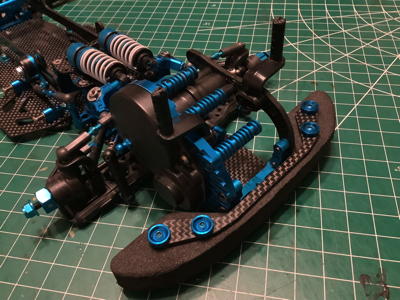
Here we can take a closer look at the front gearbox and suspension assembly and see that I've added a sway bar.  On the right I've added the foam bumper and an upgraded carbon bumper support.  Some heat sinks have been added to the motor mount.  I've also installed the body posts.
     

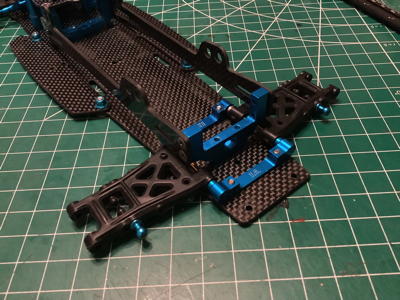
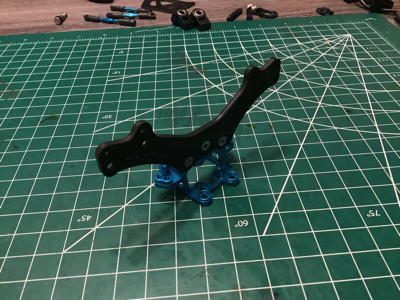
I've added the aluminum suspension mounts myself (they are not part of the upgrade kit).  The parts on the right include an aluminum rear bulkhead and a carbon shock tower.  Both came with the upgraded model I bought but are not part of the Tamiya upgrade kit.  The rear suspension is re-used from the R.
     
Attachments:

Please Log in to join the conversation.

Blakbird's FF-03 Full Family Build 1 year 8 months ago #80093

  • blakbird
  • blakbird's Avatar Topic Author
  • Offline
  • Impressive Numbers
  • Impressive Numbers
  • Posts: 1426
  • Likes received: 1282
Now I've completed the rear suspension.  The aluminum uprights are aftermarket and the TRF shocks are from the R.  Note the very wide arc of holes available for the top attachment of the rear shocks.
   

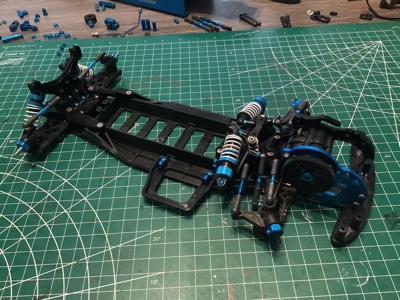
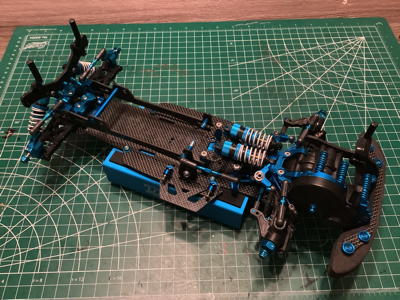
Here is the completed FF-03 with the Tamiya upgraded chassis installed.  Many of the other upgraded parts are from the FF-03 R, but I've added a large number of additional upgrades so this model is actually far beyond what you would normally get with the upgrade kit.
Attachments:

Please Log in to join the conversation.

Blakbird's FF-03 Full Family Build 1 year 8 months ago #80095

  • blakbird
  • blakbird's Avatar Topic Author
  • Offline
  • Impressive Numbers
  • Impressive Numbers
  • Posts: 1426
  • Likes received: 1282
The FF-03 EVO is the model I actually wanted to build when I started this project.  All the other variants just came along with the purchase.  I consider the EVO to be the ultimate incarnation of the FF-03 (although the upgrade kit is a close second).  I started by building the EVO in a completely stock configuration which is what I am documenting here.
 
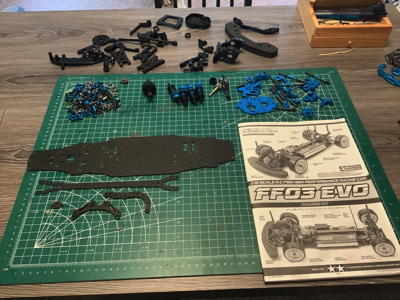
The model arrived assembled so I started by completely stripping it down to kit form as shown.  There actually aren't very many parts in this chassis given that it has only one gearbox and differential, and very little of it is plastic.  Carbon fiber and anodized aluminum are well represented here.
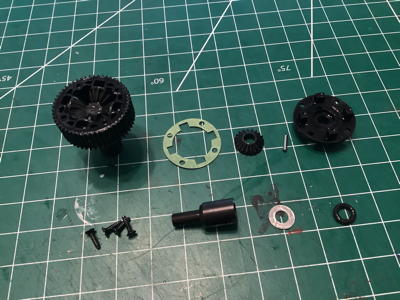
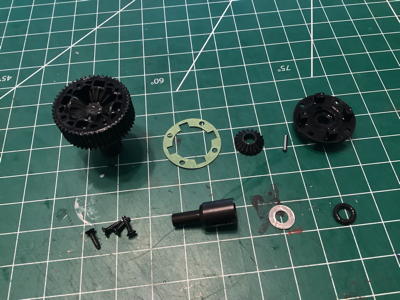
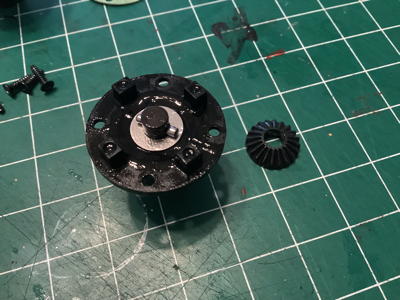
Unlike the standard variants of the FF-03, the EVO uses a sealed gear differential instead of a ball differential.  The internal gears, including the 4 spider gears, are all reinforced plastic.  The drive cups are sealed with o-rings and then the housing is filled with extremely thick #100000 silicone oil that appears to be unique to FWD models.  This viscous fluid resists, but allows, differential motion of the axles.
   

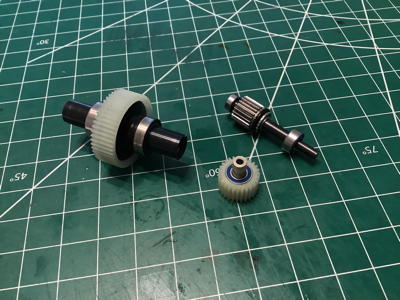
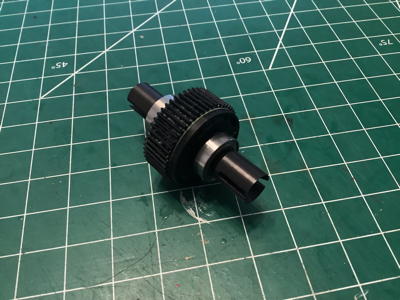
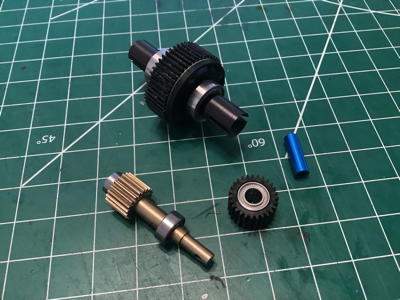
Here is the completed differential along with the other components of the gearbox.  The spur gear shaft appears to be hard anodized aluminum with an integral gear for minimum rotating inertia.  The idler gear is plastic and rides on a blue anodized aluminum shaft.  All rotating parts use special low friction fluorine coated sealed ball bearings.
   

Now the gears can be added to the reinforced gearbox housing as shown.  The front upper arm mount has been added on the right along with the long aluminum ball connectors and aluminum spacers.  All the parts on this kit are so nice.
   
Attachments:

Please Log in to join the conversation.

Blakbird's FF-03 Full Family Build 1 year 8 months ago #80096

  • blakbird
  • blakbird's Avatar Topic Author
  • Offline
  • Impressive Numbers
  • Impressive Numbers
  • Posts: 1426
  • Likes received: 1282
The EVO uses an anodized aluminum motor mount with machined heat sink pockets and a carbon fiber motor stay.  All of hardware is hex drive instead of JIS including the rare 3x48mm button head cap screws.
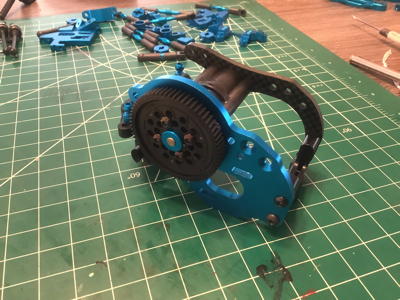
The spur gear mount is also aluminum but gets mostly hidden once the 68T 0.4 mod spur gear is installed.  The motor sits ahead of the axle for maximum weight over the front wheels.
   

The bracket for the inboard front suspension is machined, anodized aluminum and supports the pivots for the suspension cranks.  The cranks are plastic but each use 2 additional aluminum ball ends and spacers.  All of the front suspension forces pass through this assembly which will also serve as the attachment for the carbon upper deck.
   

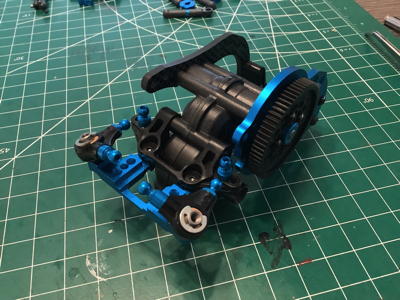
Adding the inboard front suspension mount assembly to the gearbox assembly completes the front end module.  It doesn't look like much yet, but all of the suspension parts will connect to this.
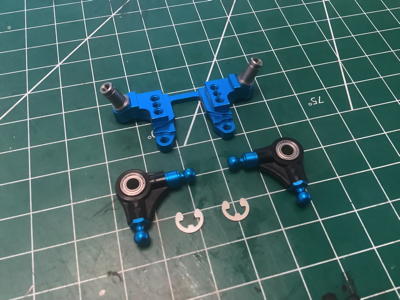
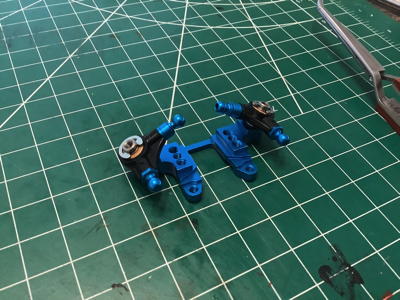
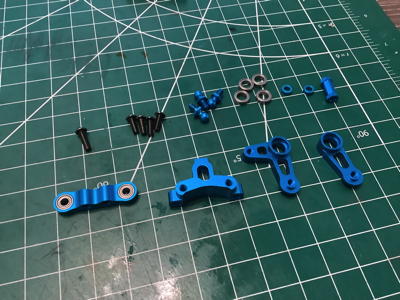
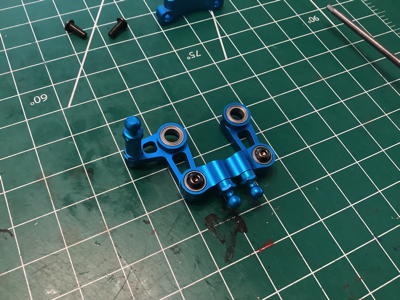
The next assembly to build is the steering system.  The dual bellcrank steering arms, steering bridge, and steering mount are all machined aluminum right out of the box.  Every joint uses ball bearings and all the ball connectors are aluminum as well.  It's all very smooth to operate.
   
Attachments:

Please Log in to join the conversation.

Moderators: caprinut, stingray-63, AndyAus
Time to create page: 0.226 seconds